Bobble stitches are one of my favorite texture tricks in crochet—especially when making small, no-sew animals. They’re perfect for adding tiny details like little paws, cheeks, tails, or fluffy textures without sewing extra pieces.
In this tutorial, I’ll show you:
- What Bobble-X-dc means
- How to crochet a bobble stitch step-by-step
- And most importantly, how to get a cleaner color change when working bobbles (so your amigurumi looks neat and professional!)
Let’s get started!
What Is a Bobble Stitch in Amigurumi?
A bobble stitch creates a puffy, raised bump that pops out from the fabric. In amigurumi, it’s often used to add small 3D details without attaching extra parts.
You’ll see bobble stitches used in:
- Small “no-sew” animals (ears, cheeks, paws, horns)
- Cute texture accents (little nubs, bumps, feathers, fur)
- Decorative details on dolls or plushies
Even if your project is simple, a few bobbles can make it look so much more interesting and adorable!
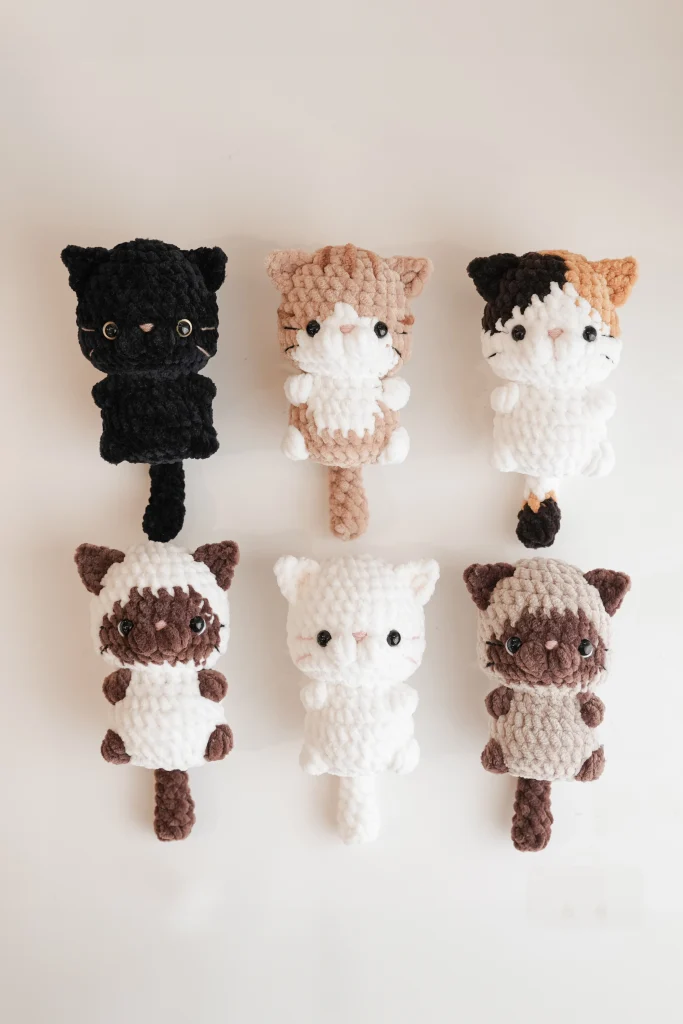
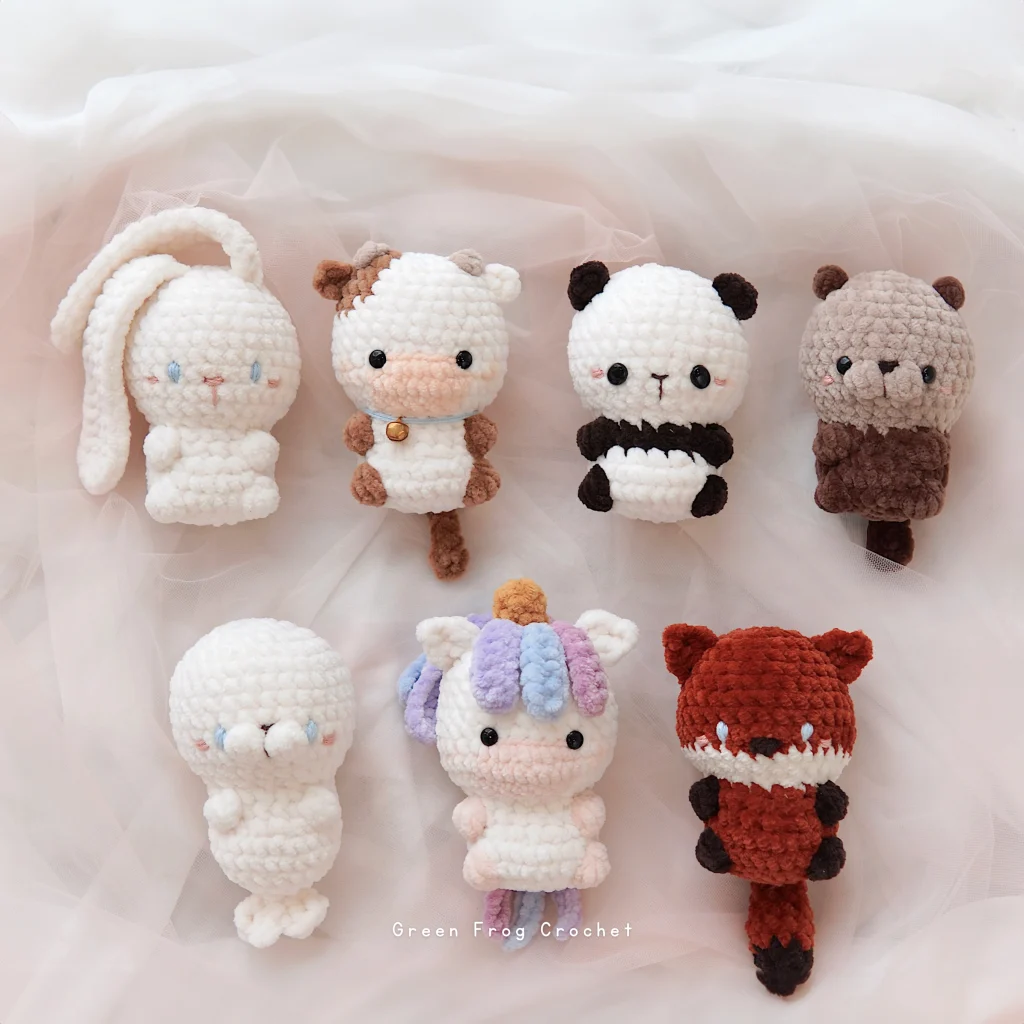
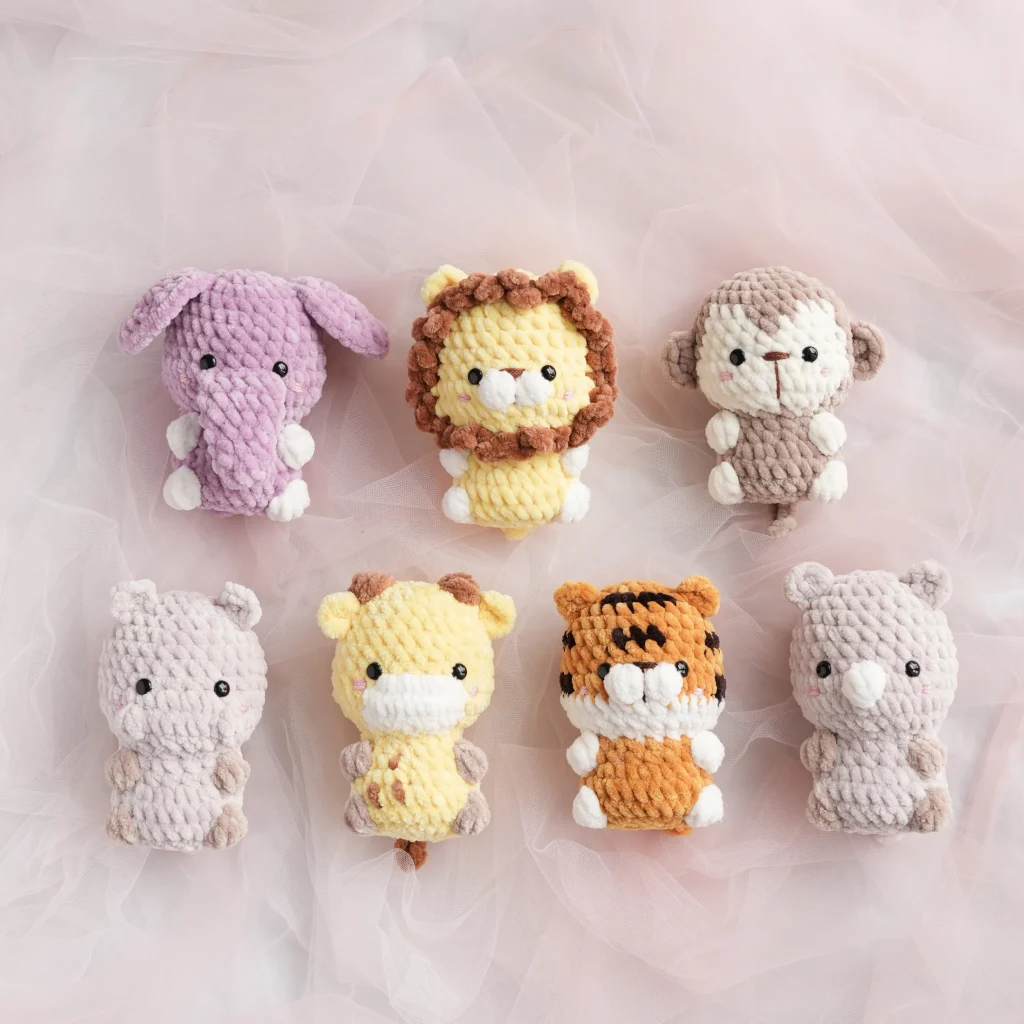
For example, I used bobble stitches to make the muzzle, horn, and paws for these no-sew safari crochet animals. Aren’t they super cute?
If you’d like to crochet your own set, you can grab the pattern here!
Get Free Patterns Straight to Your Inbox
If you love free patterns, come join my newsletter! I share new designs, crochet tips, and the occasional sweet deal. No spam, I promise. Just the good stuff every now and then.
Bobble-X-dc Definition (What It Means)
When you see this in a pattern:
Bobble-X-dc, with X is a number.
It means: Make X incomplete double crochet stitches in the same stitch, then yarn over and pull through all loops on your hook.
For example:
- Bobble-3-dc: a bobble stitch made of 3 incomplete double crochet stitches in the same stitch.
- Bobble-4-dc: a bobble stitch made of 4 incomplete double crochet stitches in the same stitch.
In simple words:
You build several half-finished double crochets in one stitch, leaving loops on the hook.
Then you finish them all at once, creating that “puffy bobble” shape.
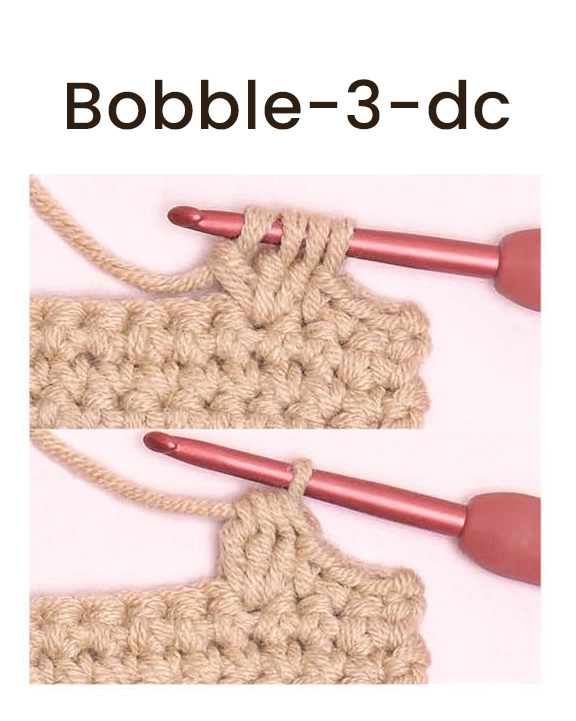
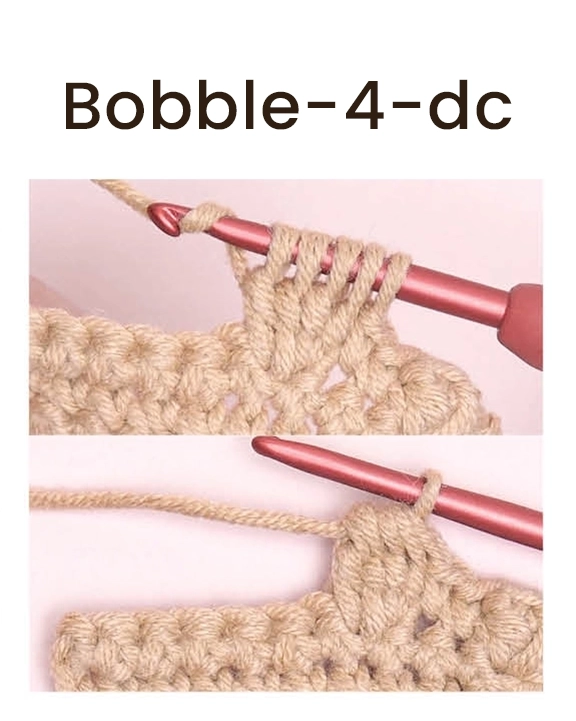
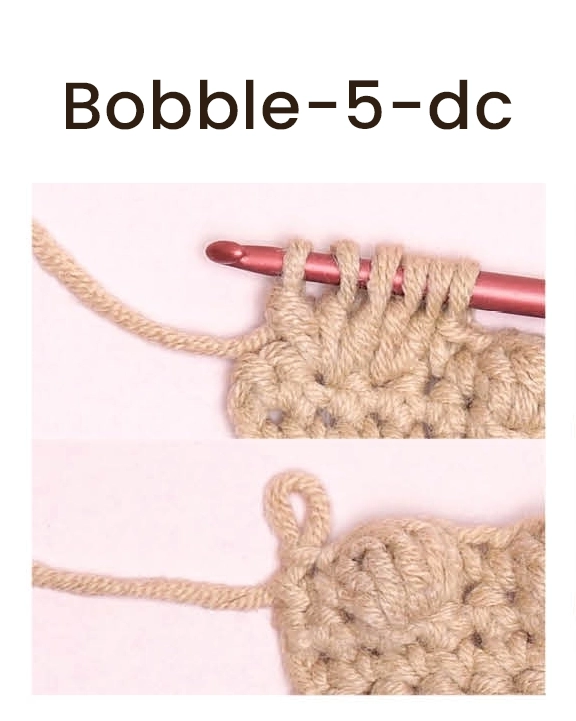
How to Crochet Bobble-X-dc (Step-by-Step)
Here’s the classic bobble technique used in amigurumi.
Step 1: Yarn over your hook (just like starting a normal double crochet).
Step 2: Insert your hook into the stitch where the bobble will be made.
Step 3: Pull up a loop. You’ll now have 3 loops on your hook.
Step 4: Yarn over and pull through 2 loops. Now you’ll have 2 loops on your hook. That is one incomplete double crochet.
Step 5: Repeat steps 1–4 in the same stitch until you have X (number of) incomplete dc stitches made. Each time you add one incomplete dc, you add one extra loop on your hook.
Step 6: Finally, yarn over and pull through all loops on your hook in one go
Now your bobble stitch is complete!
Tip: After finishing, you can gently push the bobble outward so it pops on the correct side of your amigurumi.
Why Color Changes Look Messy with Bobble Stitches
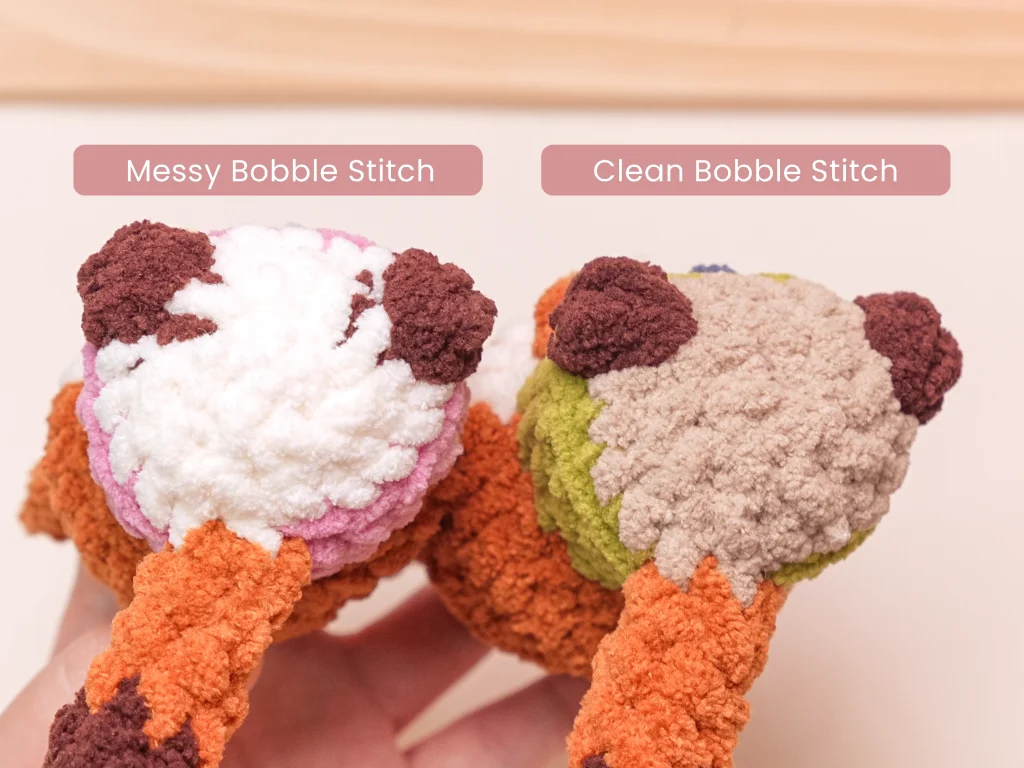
Color changes during bobble stitches can sometimes look messy because bobbles hold multiple loops on the hook—and the yarn can peek through in the wrong place.
Common problems include:
- A visible old-color stripe showing on the bobble
- A “dot” of wrong color at the top of the stitch
- Color change line looking uneven or blurry
But don’t worry — there’s an easy method to make your color change look much cleaner.
How to Make a Cleaner Color Change with Bobble Stitches
This is my favorite trick for cleaner bobble color changes.
The idea is simple: Start the bobble with the new color, but finish the final pull-through using the original color.
This helps hide the messy transition and keeps the bobble looking crisp.
Step-by-Step: Clean Color Change for Bobble Stitches
1) In the last stitch before the color change, do NOT switch yarn in the final yarn over
When you crochet the stitch right before the bobble color change, keep the same yarn color in the final yarn over.
So instead of changing yarn at the end of that stitch, finish it normally with the old color.
Now you should have only 1 loop on your hook in the old color.
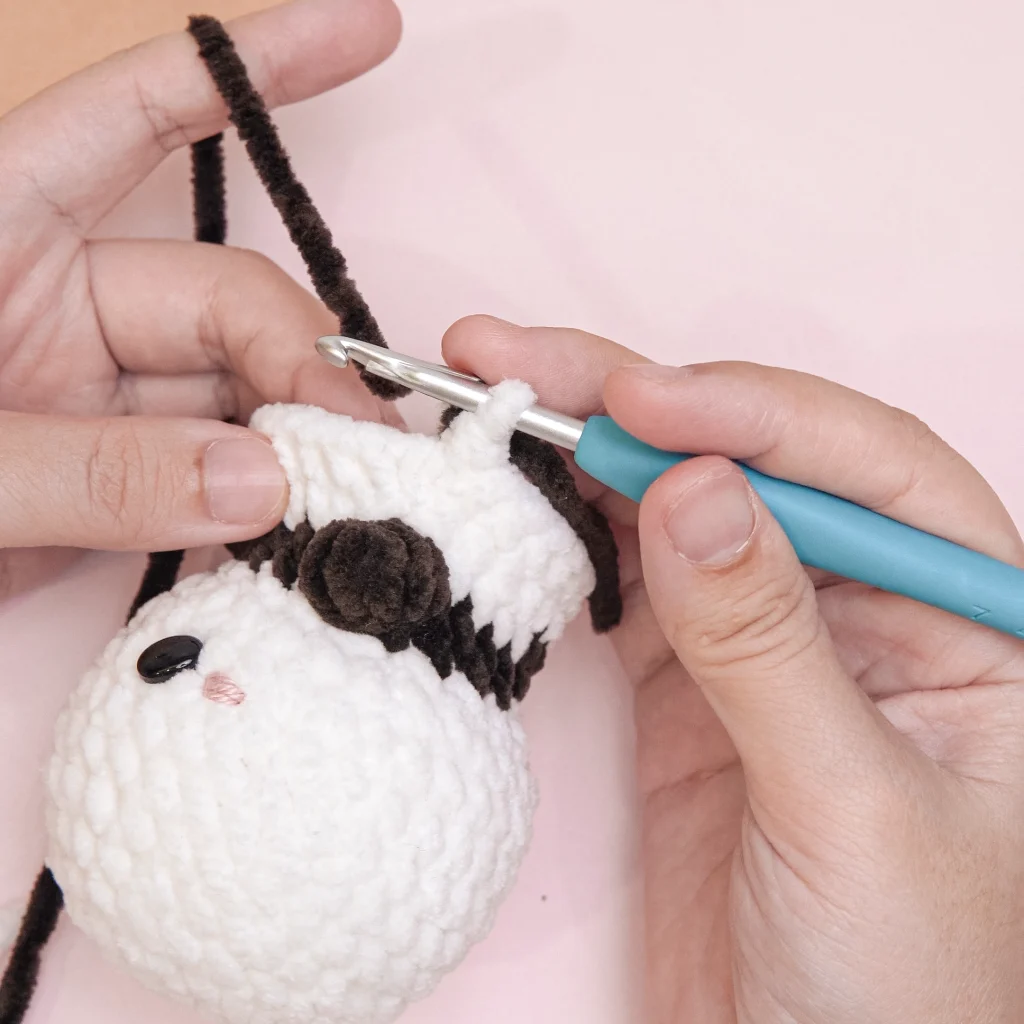
2) Start the bobble using the new color
- Tighten the yarn, then tie the new color to the original color securely.

2. With the new color, yarn over your hook.
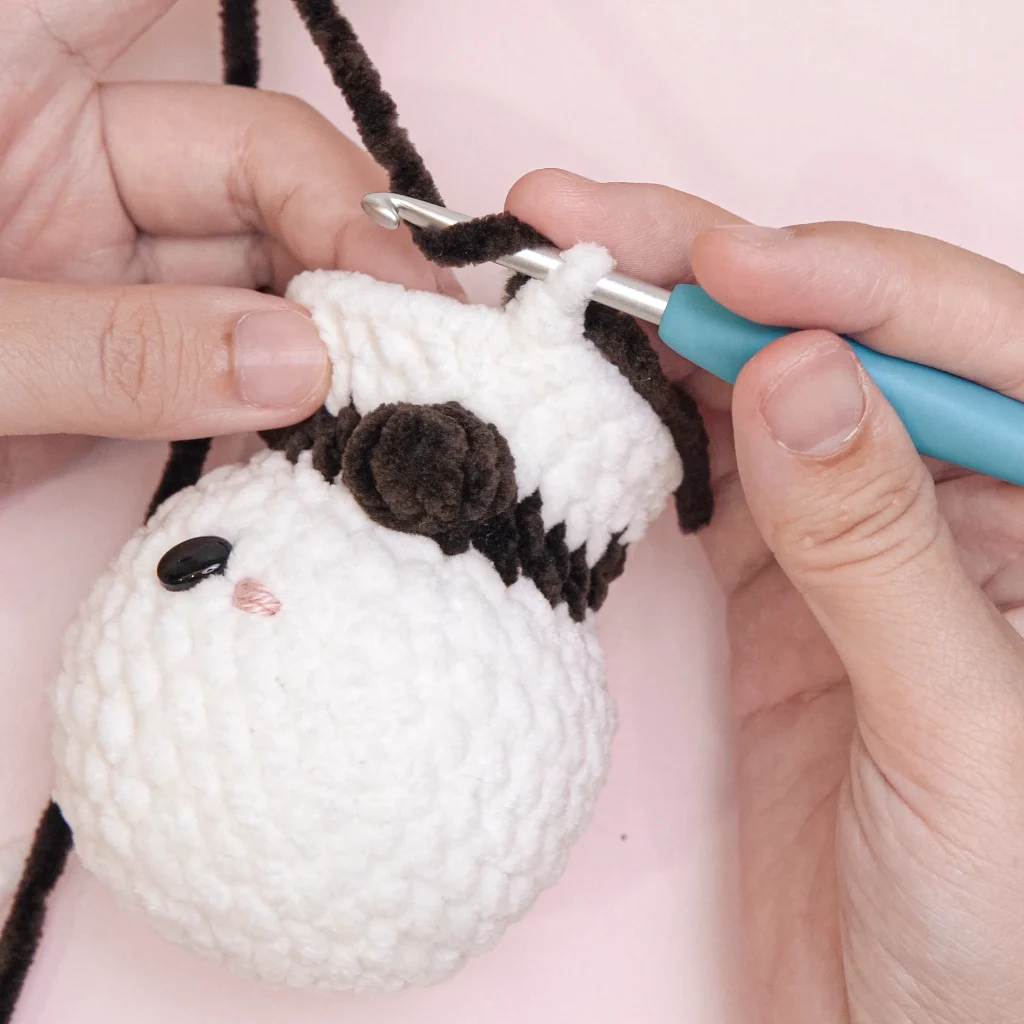
3. Insert your hook into the next stitch and crochet the required number of partial double crochet stitches for the bobble. Tie the new color yarn tails together to secure them, then gently push the bobble outward so it pops to the outside.
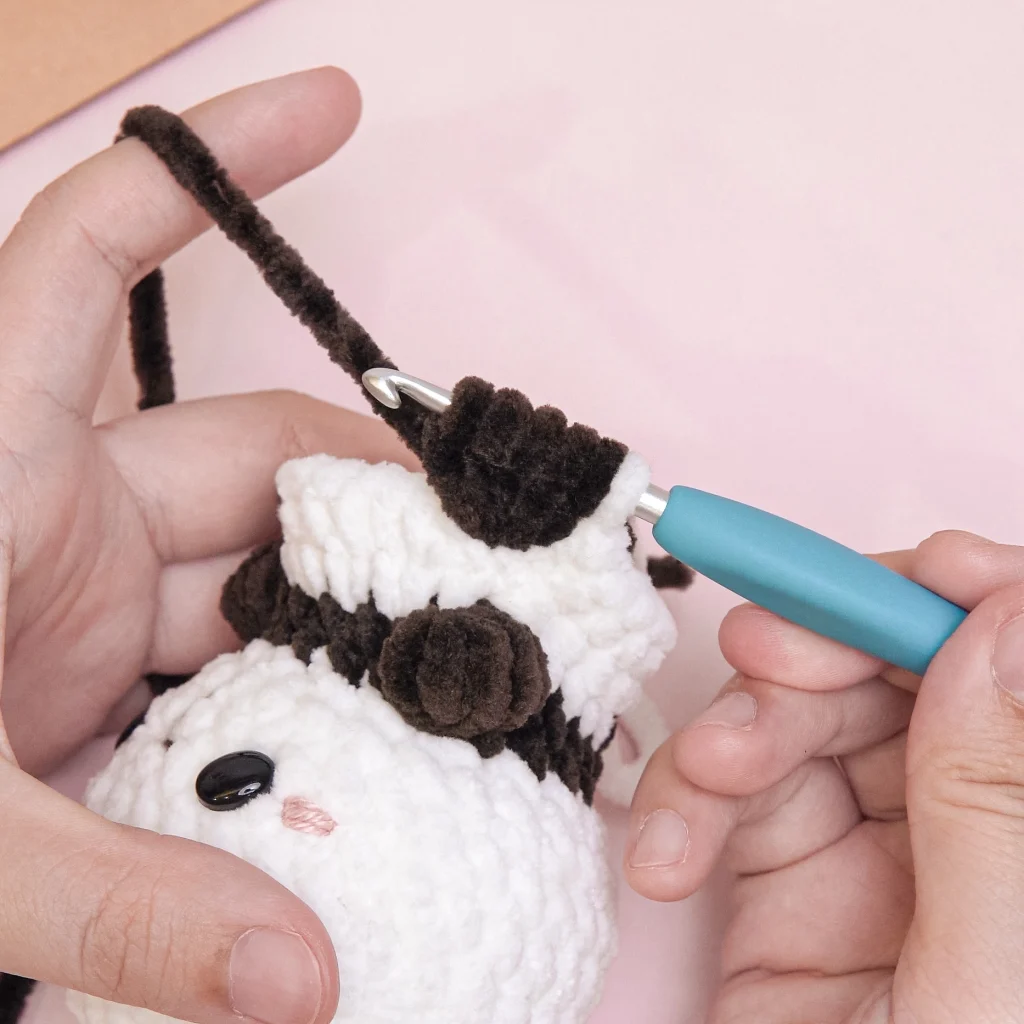
4. Switch back to the original color, yarn over, and pull through all loops on your hook to finish the bobble stitch.
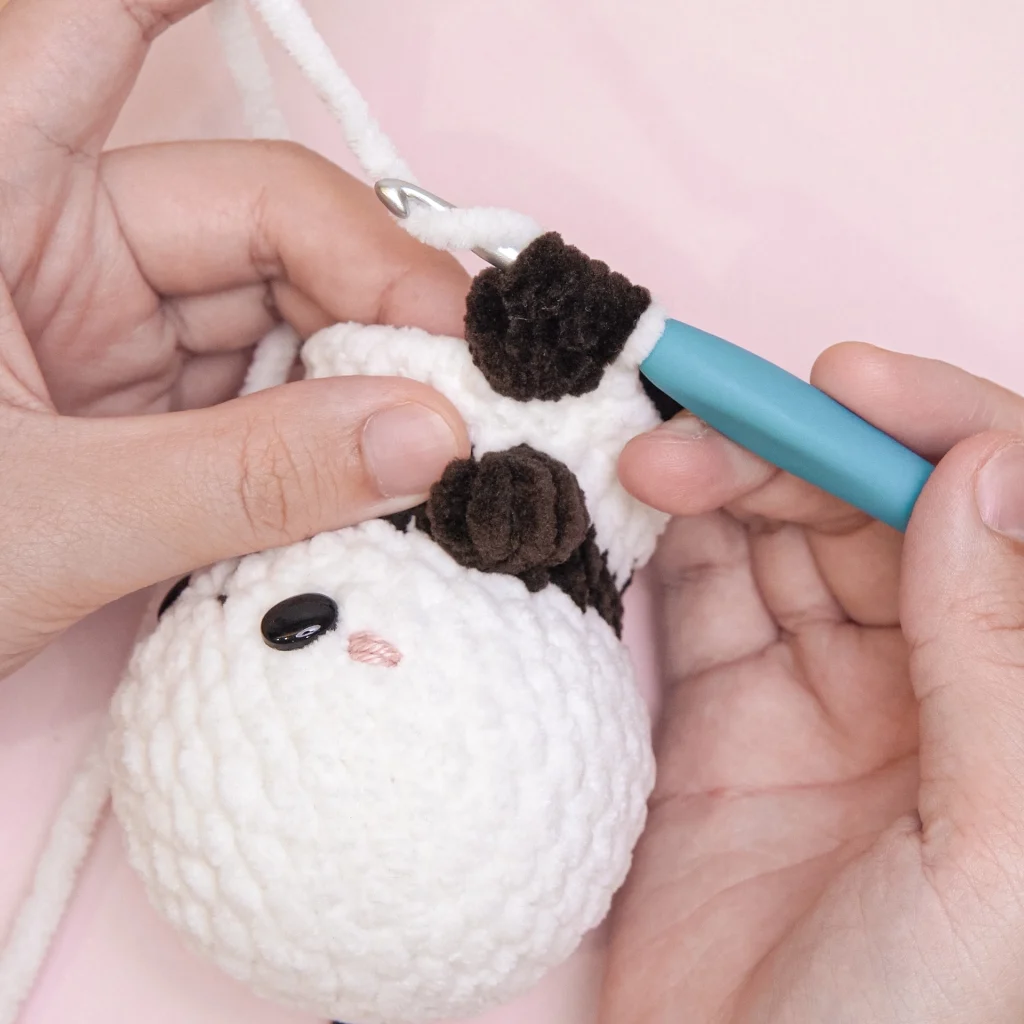

This locks the bobble neatly and helps make the color change look cleaner and less “spotty”. If your bobble looks flat, don’t worry — just use your fingers to push it outward and it will become round and puffy!
Extra Tips for Perfect Bobbles (So They Look Super Cute)
Here are a few quick tips to make your bobbles look consistent:
- Keep your tension steady: Loose tension makes bobbles messy, and tight tension makes them hard to finish.
- Count your incomplete dc carefully. If the pattern says Bobble-3-dc, make exactly 3 incomplete double crochets.
- Push the bobble to the right side: In amigurumi, bobbles can sometimes pop inward. Just push them outward after completing the stitch.
- Secure yarn tails neatly: Color changes always create yarn tails, so make sure to tie and weave them in securely.
Final Thoughts
Bobble stitches may look tricky at first, but once you understand the technique, they become super fun to use, especially in small amigurumi projects.
And if you’ve ever struggled with messy bobble color changes, this cleaner method will make your stitches look neater, smoother, and more polished.
If you try this technique, you’ll see a big difference in how your bobbles look in finished projects!
Did you find this post helpful? Please share it with your friends so they can learn this trick too!
Happy crocheting!