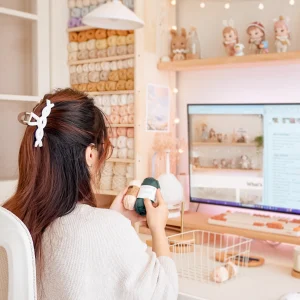
Welcome to the Crochet for Beginners series! If you’re starting from scratch and want to make your own projects, you’re in the right place.
Let’s get your crochet kit ready. Crochet is actually pretty easy once you get the hang of it.
The Essentials
1. Yarn: Choosing the right yarn is the biggest factor in how fast you’ll learn.
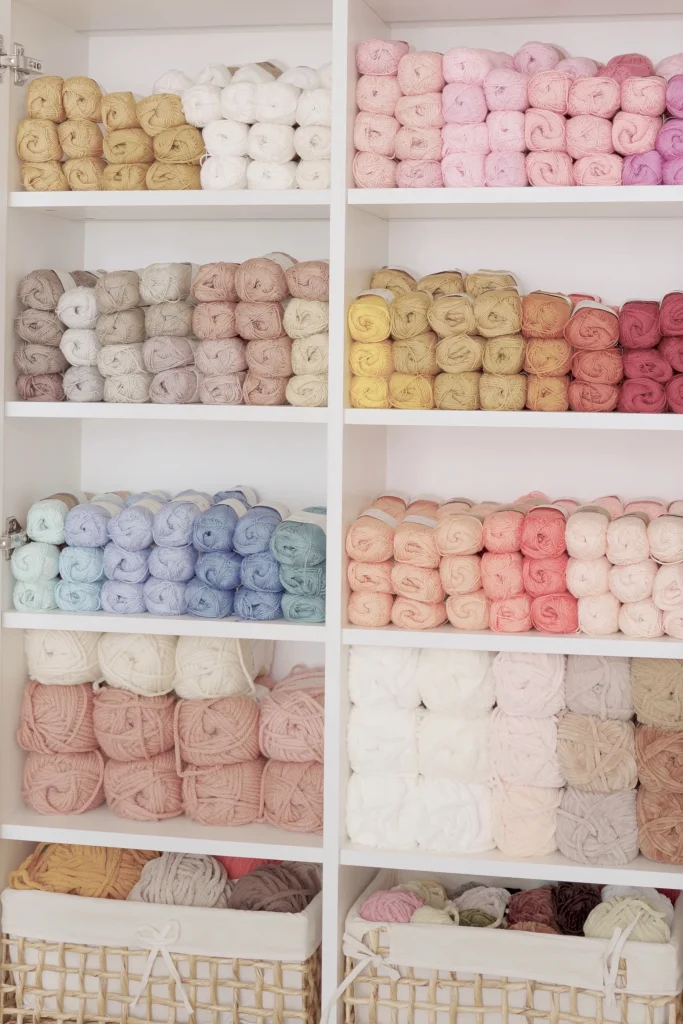
- Cotton and Acrylic blend: A cotton and acrylic blend is my top recommendation for beginners. It has a slightly firm yet soft texture, making it easier to handle while still keeping stitches visible. My recommend brand: Yarnart Jeans, Lion Brand Made With Love.
- 100% Cotton: It’s “stiff” and smooth, making it very easy to see your stitches. Perfect for amigurumi and summer accessories. My recommended brands: Scheepjes Catona, Schachenmayr Catania.
- Acrylic: Soft and affordable, but can be a bit fuzzy. My recommended brands: Premier Basix Worsted, Premier Anti-Pilling, Lion Brand Basic Stitch, Caron Simply Soft.
- Plush/Chenille: Incredibly soft, but avoid these for your first project. The fluff makes it nearly impossible to see where your hook needs to go. Save these for when you’re more experienced! My recommended brands: Premier Parfait Chunky, Bernat Blanket, Himalaya Dolphin Baby.
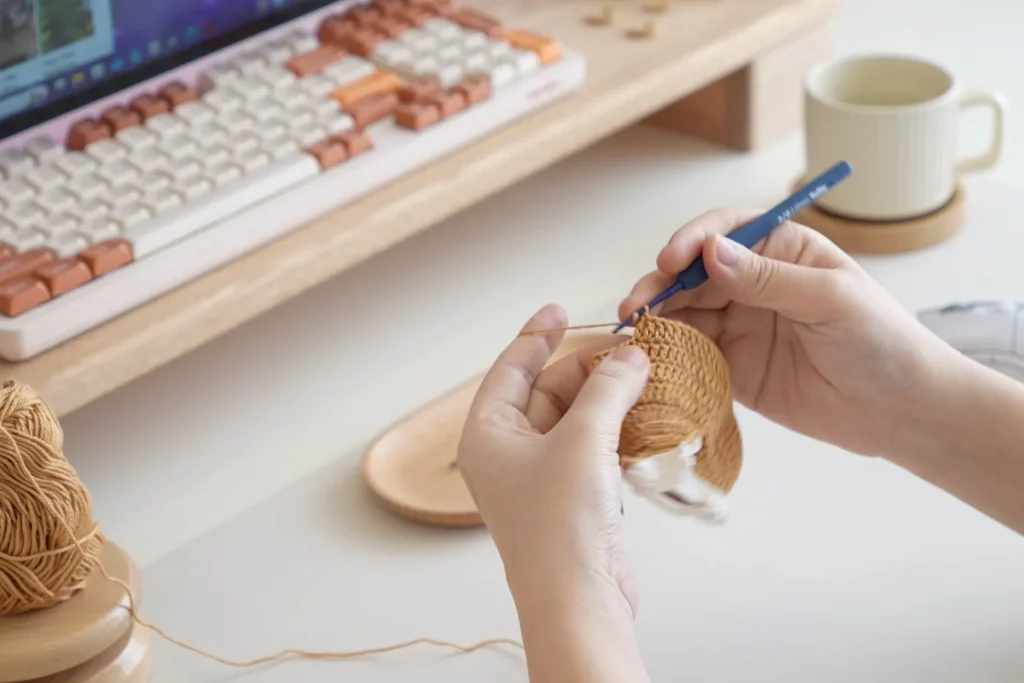
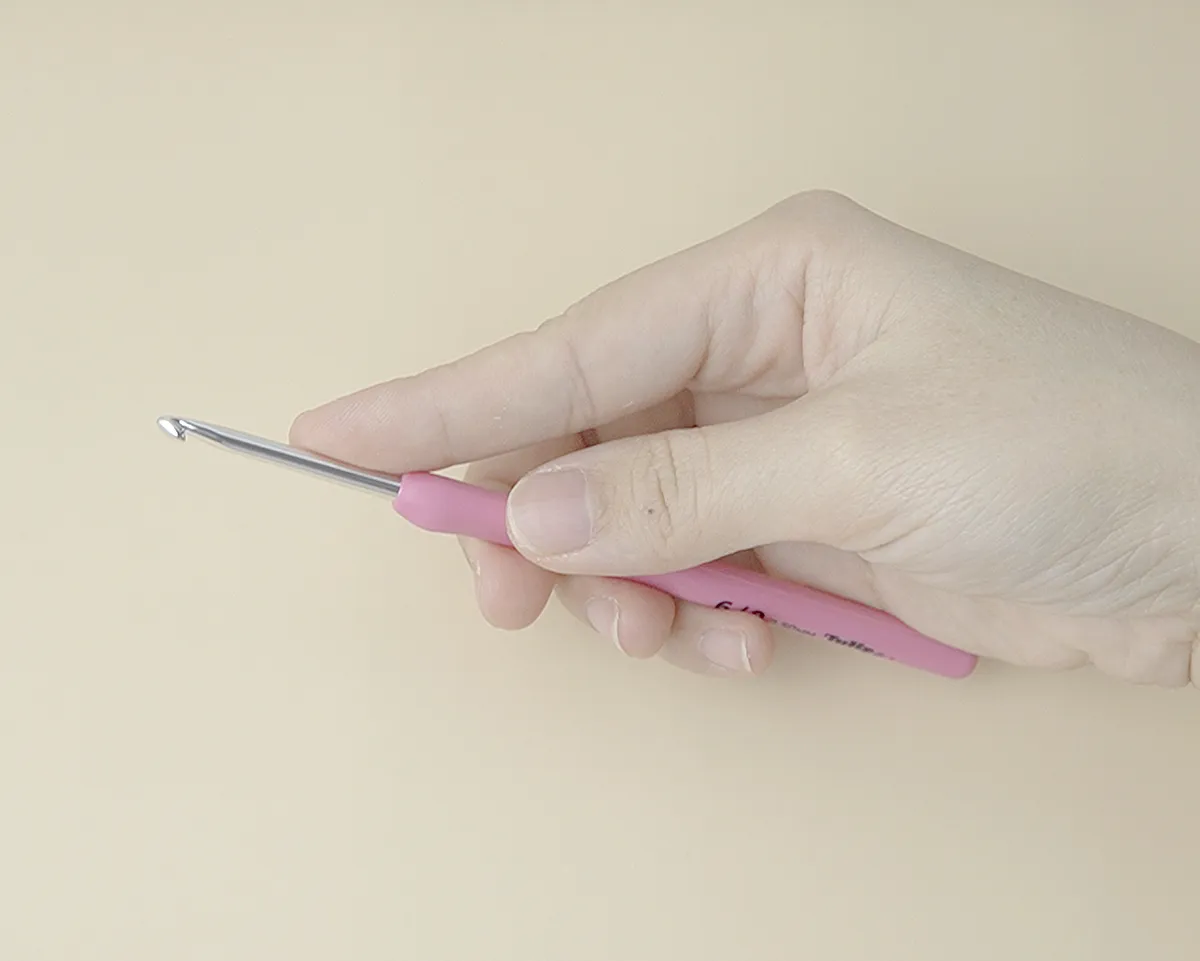
2. The Crochet Hook: A good hook should feel light and glide through yarn without snagging. Invest in one high-quality ergonomic hook early on. Your hands will thank you. My recommended crochet hooks: Tulip Etimo, Clover Amour.
3. Must-Have Accessories
- Stitch Markers: Essential for amigurumi since we work in continuous spirals. Use a plastic clip or a scrap of different colored yarn to mark the start of your round.
- Tapestry Needles: Use a blunt tip for sewing body parts together and a sharp tip for embroidering fine details like eyelashes.
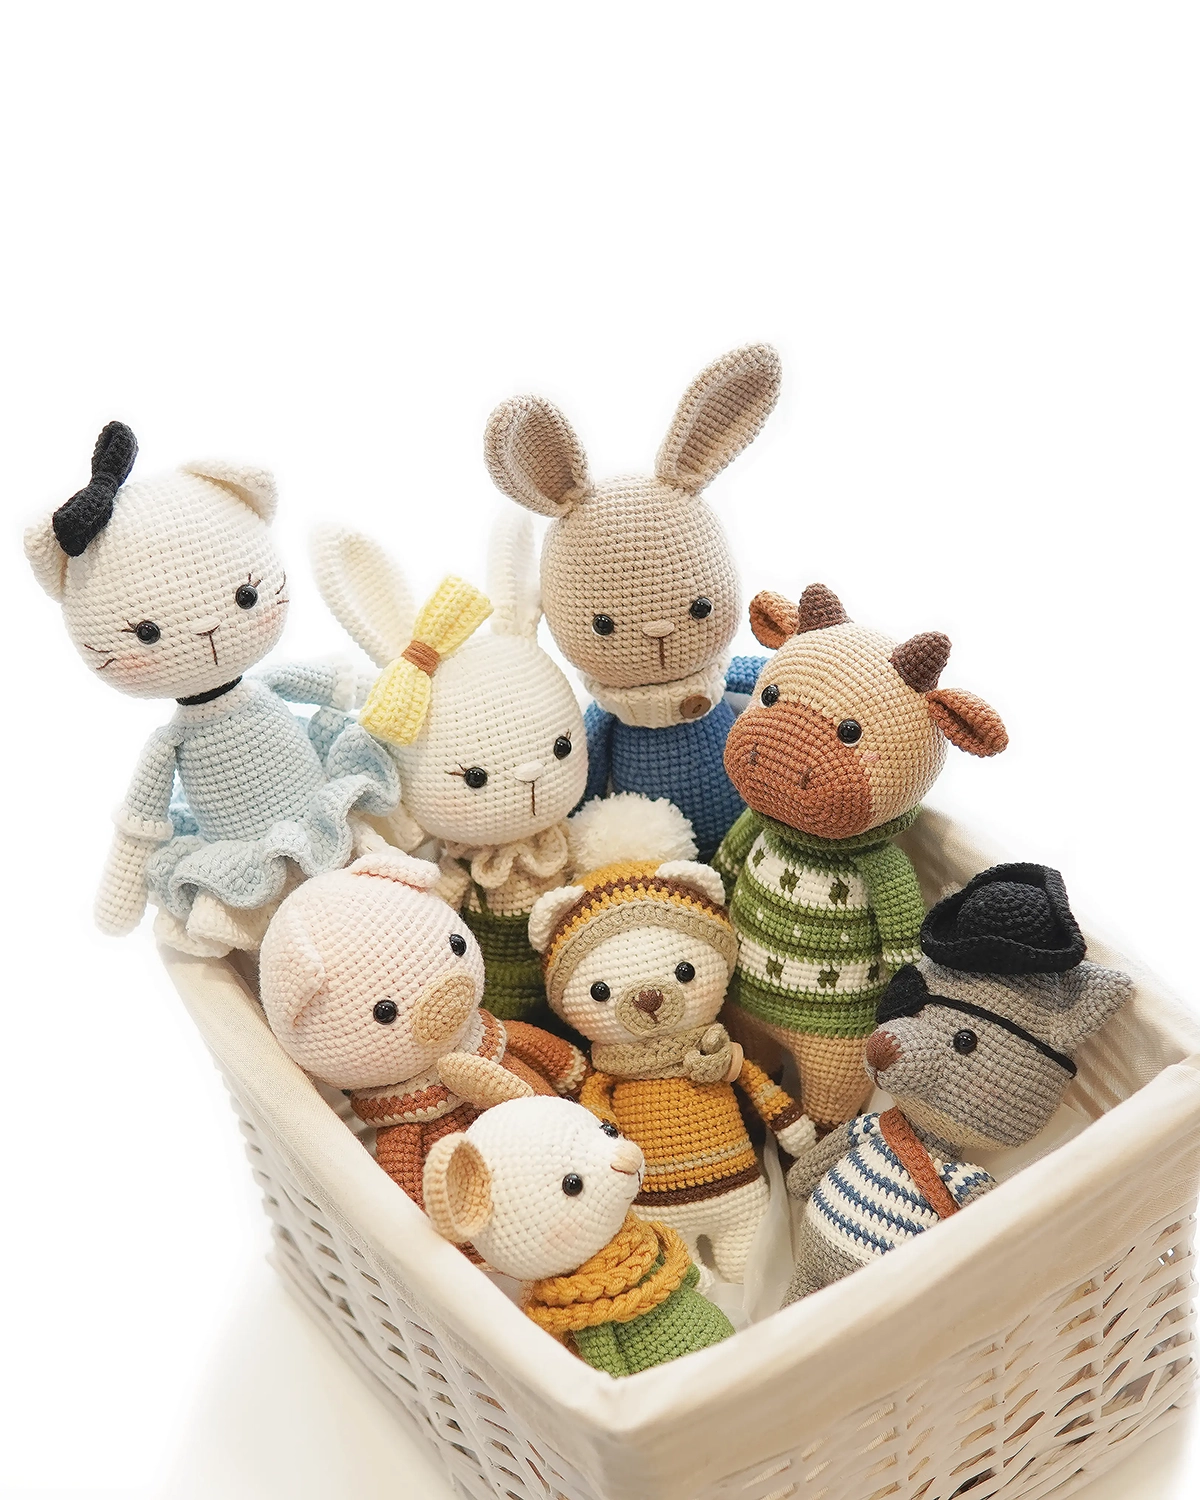
- Safety Eyes: These give your characters a professional look. Always ensure they are snapped on securely.
The Foundation
1. How to Hold the Hook
There is no “right” way, only what feels best for you. Most crocheters use one of these two styles:
Knife Grip: Hold the hook exactly like a dinner knife. This is great for chunky yarn or larger hooks. Your index finger rests on the shaft to keep the loops steady.
Pencil Grip: Hold it like a pen or chopsticks. This is the most common style for detailed work. Your thumb and index finger grip the handle while your middle finger stabilizes the hook’s shaft.
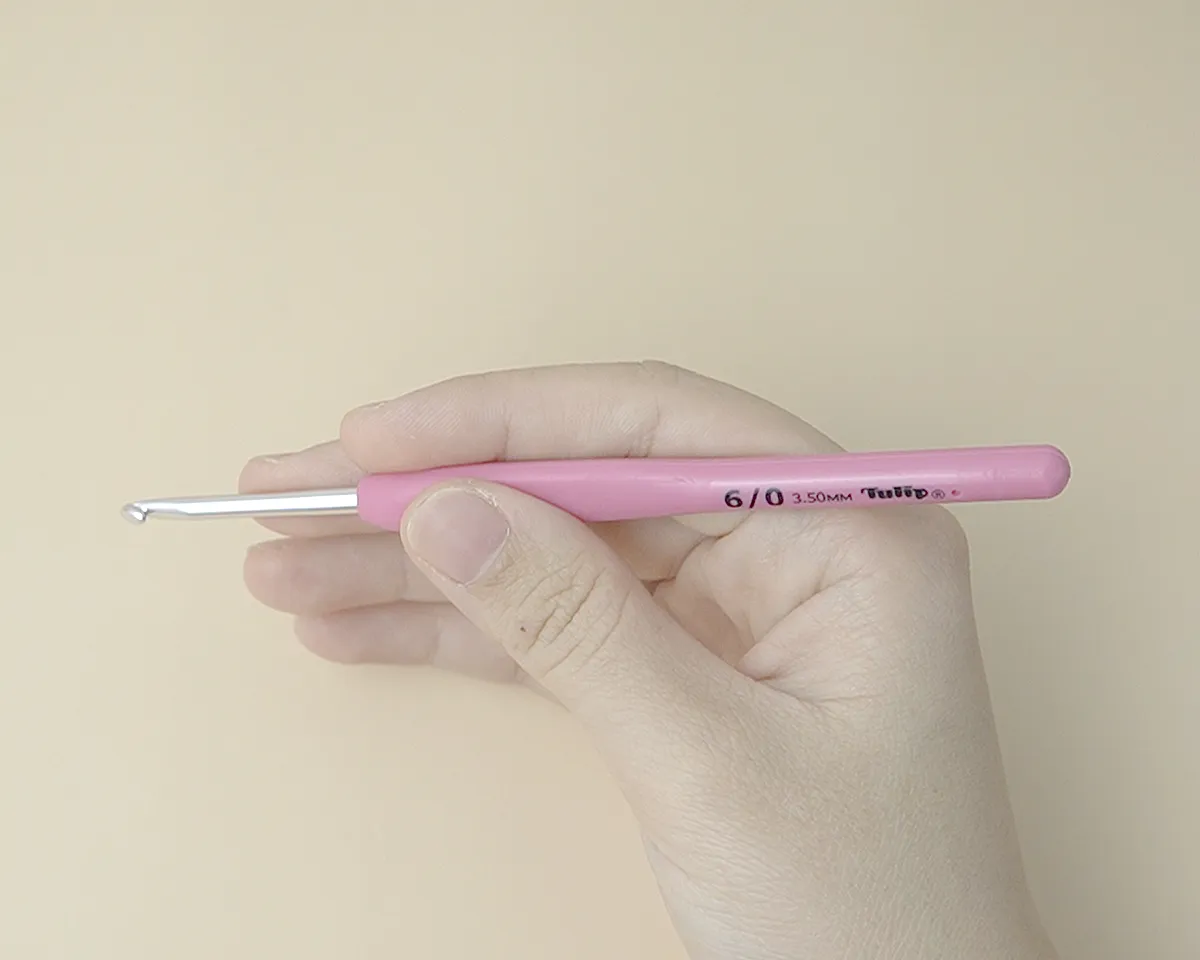
Tip: Try both! It doesn’t matter which one you choose as long as you’re comfortable. Crochet is a passion, enjoy it in the way that feels most natural to you.
2. Holding the Yarn (Tension)
The goal is to create “tension”, keeping the yarn enough to wrap easily but loose enough to move. Here is my go-to method:
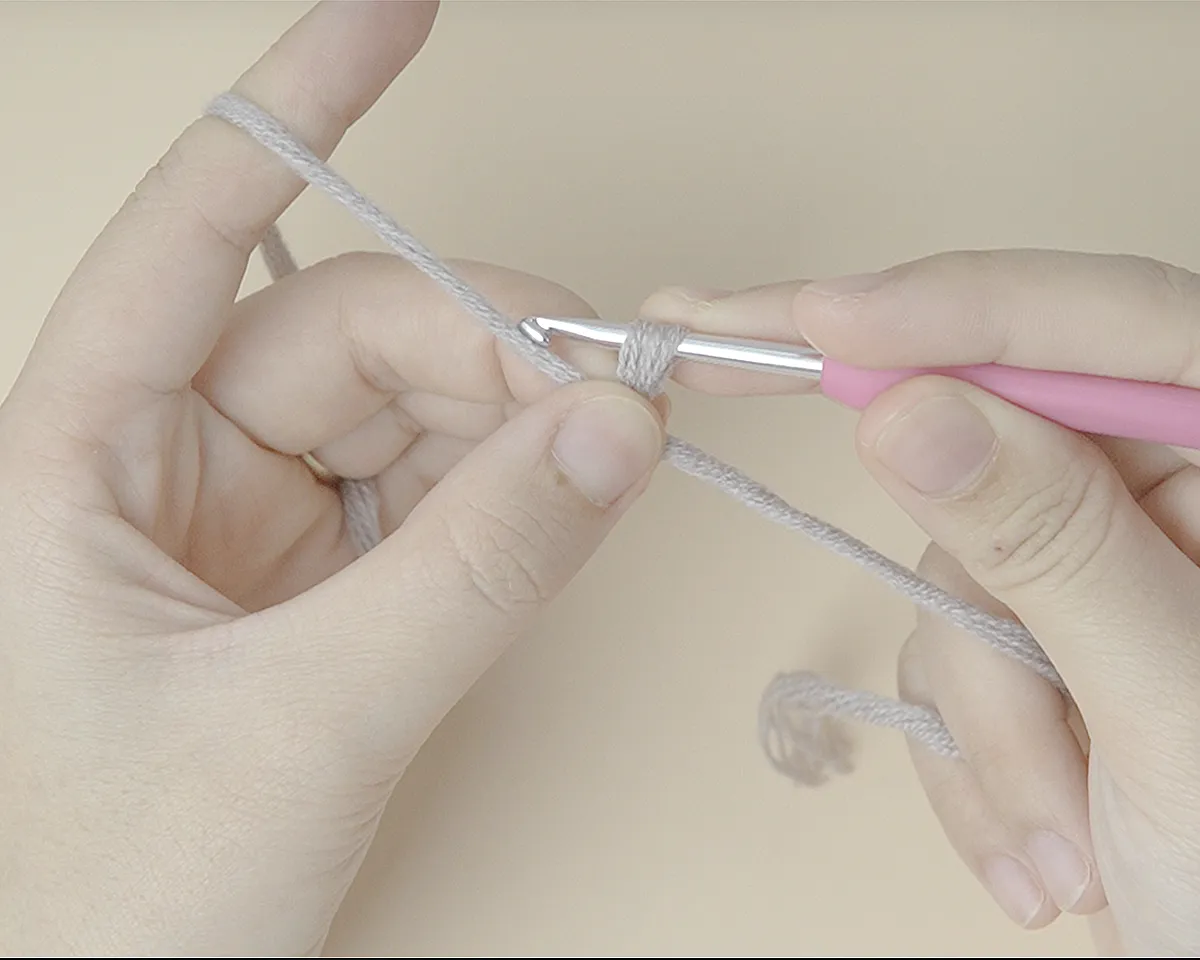
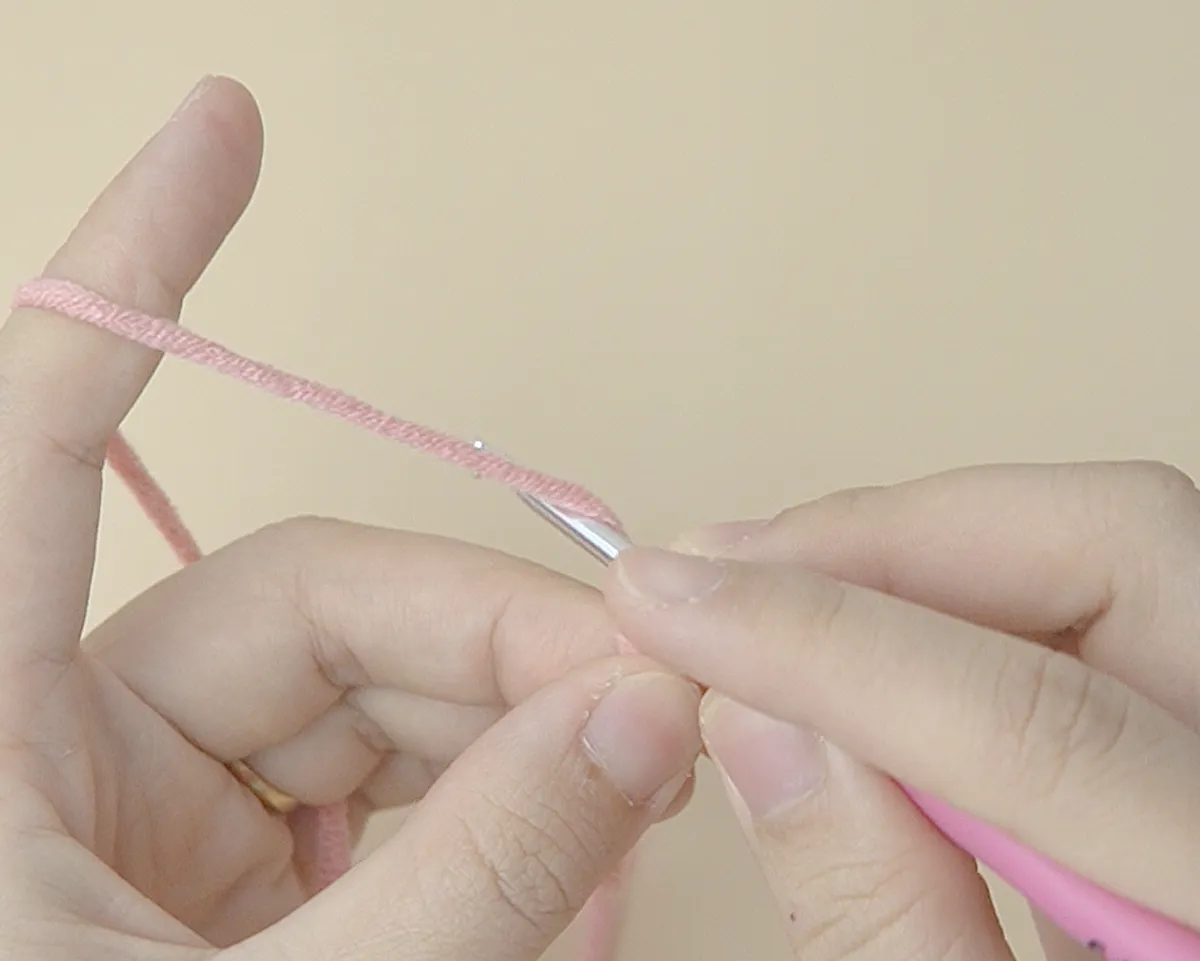
1. Pass the yarn from your palm between your pinky and ring finger, then behind your middle and index fingers.
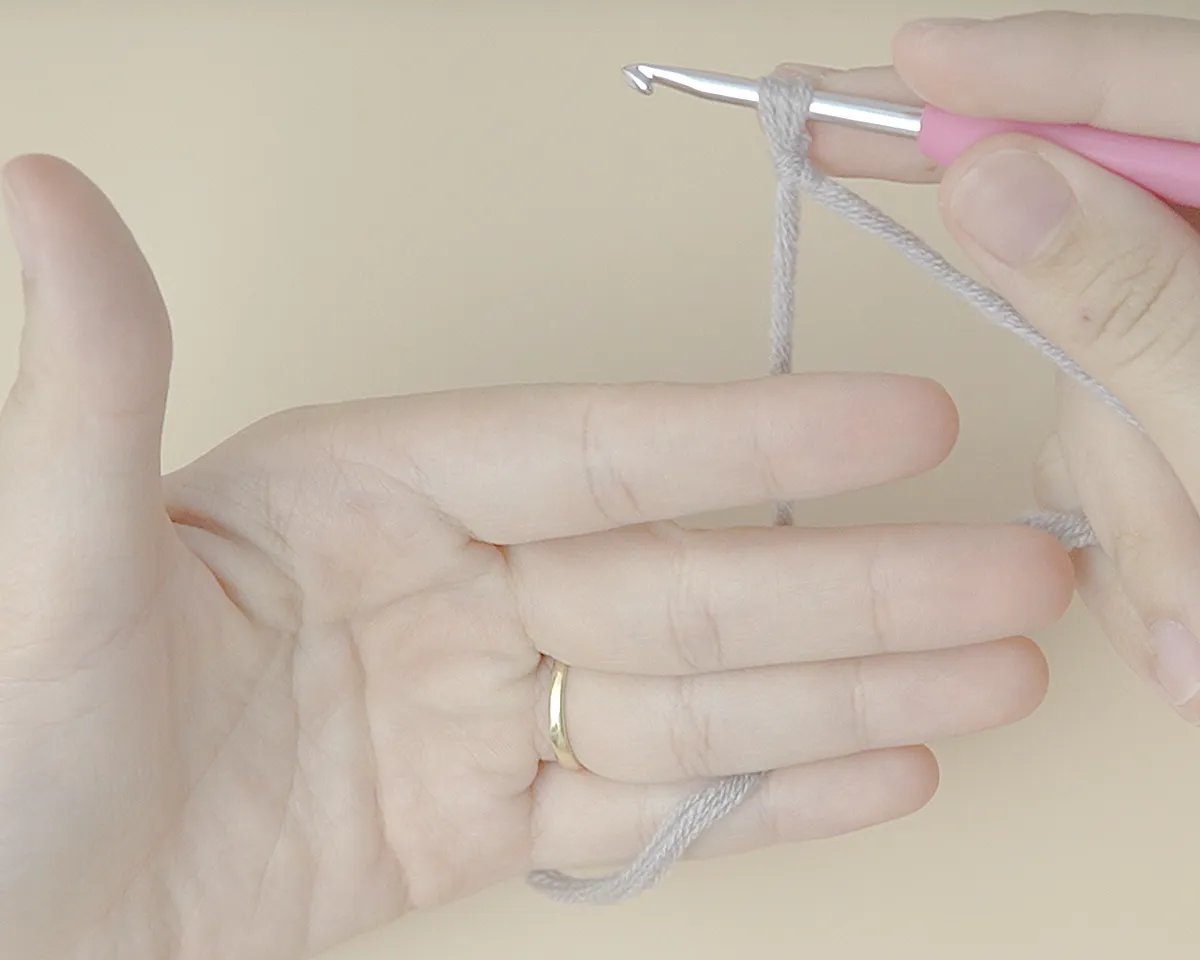
2. Bring the yarn over your index finger. If you’re a beginner and the yarn feels too slippery, wrap it around your index finger once more.
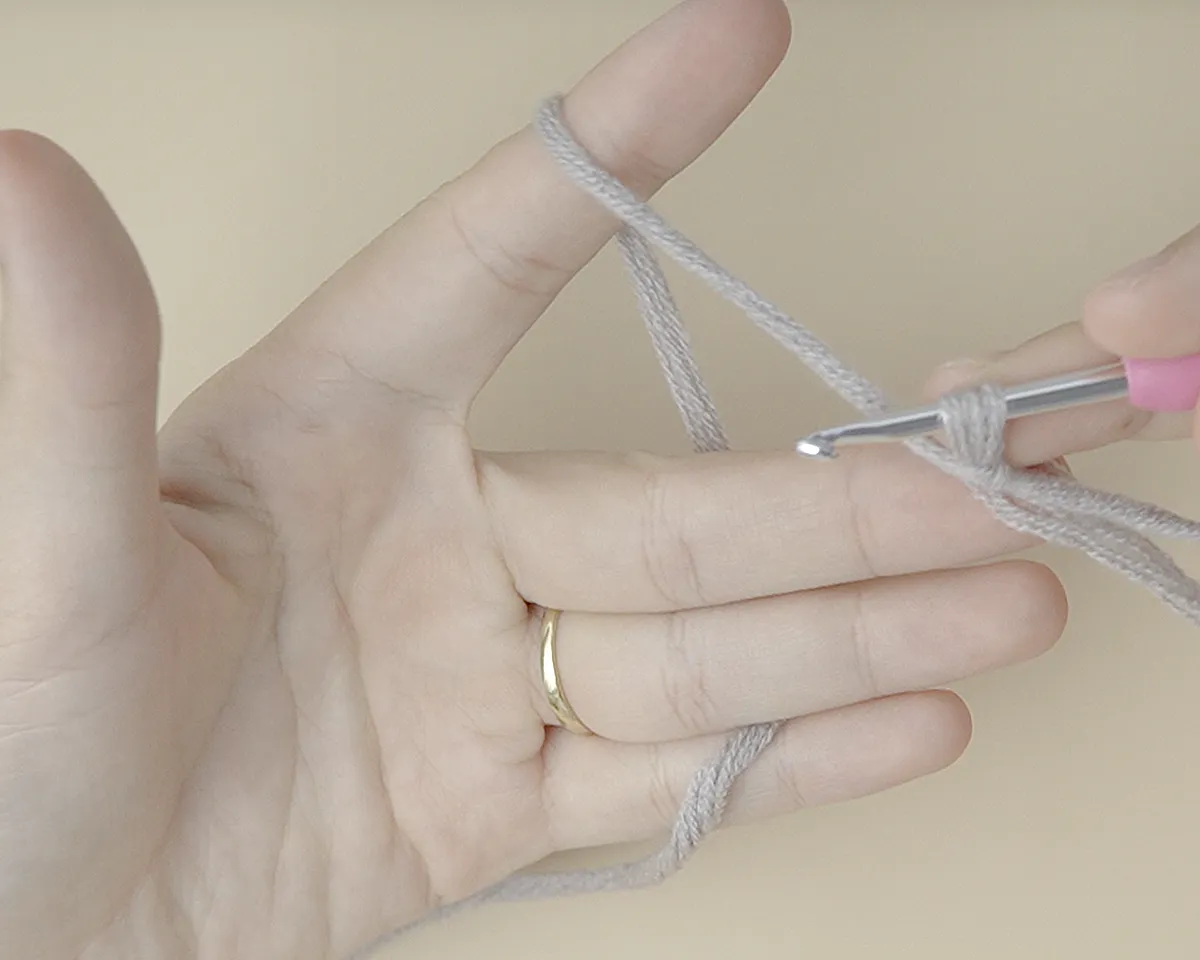
3. The Grip: Use your left thumb and middle finger to pinch your project. Use your right middle finger to steady the loop on the hook.
Most beginner crochet stitches
Before moving on to more advanced stitches, let’s go back to the basics: the slip knot, the chain stitch, and how to count your stitches.
1. The Slip Knot
The slip knot is the first step to create the loop on your hook. It’s the starting point for almost every crochet project. Please note that in most patterns, the slip knot is NOT counted as a stitch.
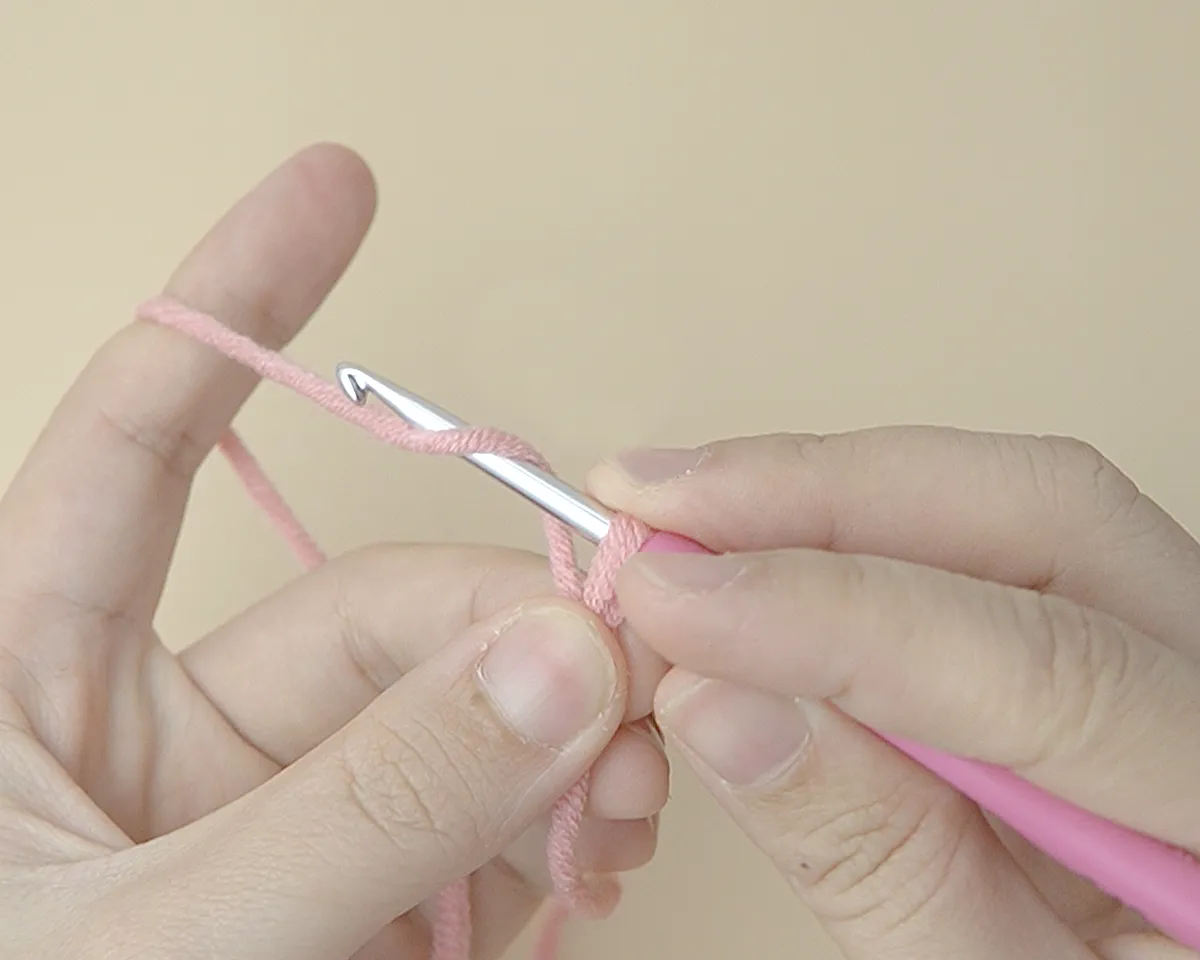
1. Wrap the yarn over your finger, crossing above the yarn tail.
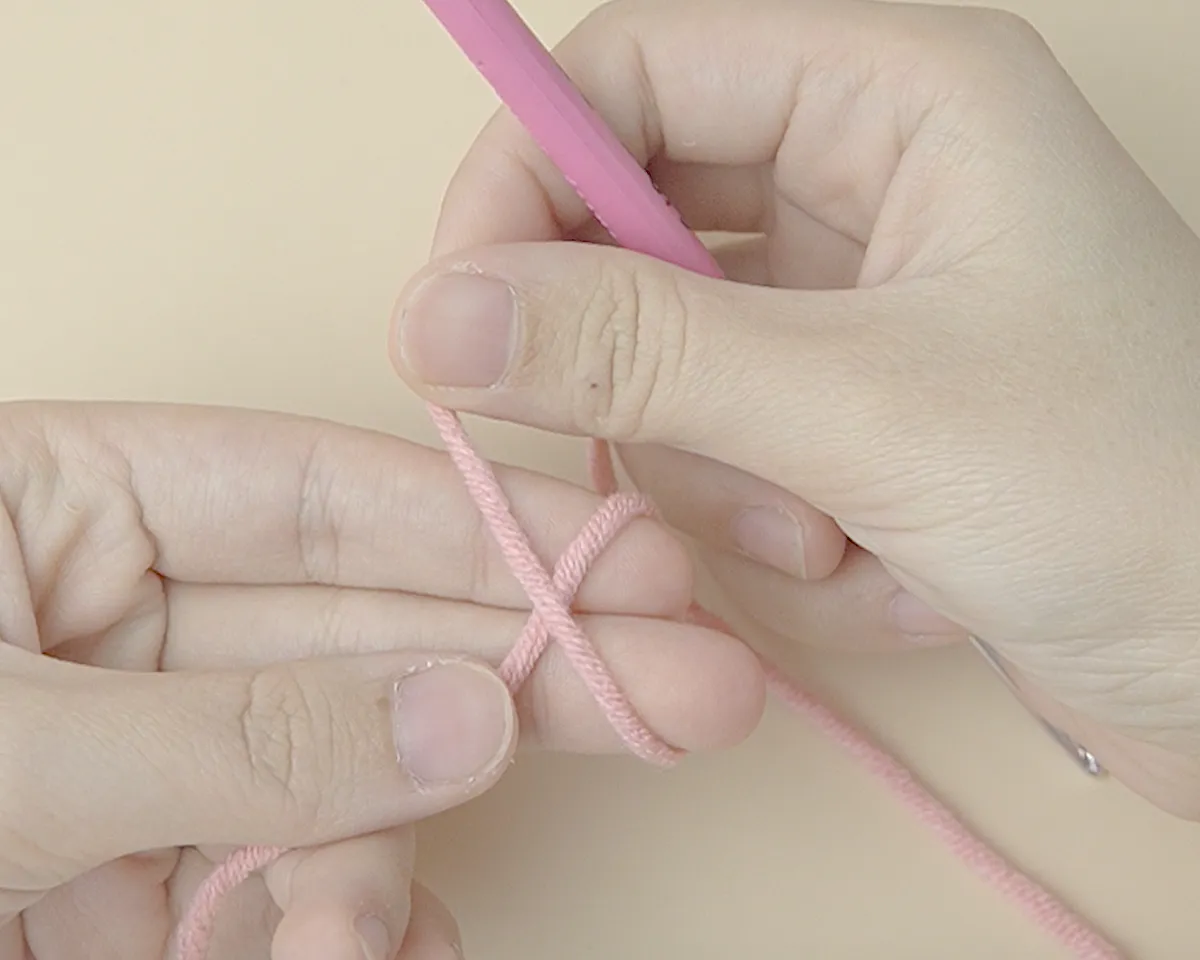
2. Bring the yarn underneath to form a loop.
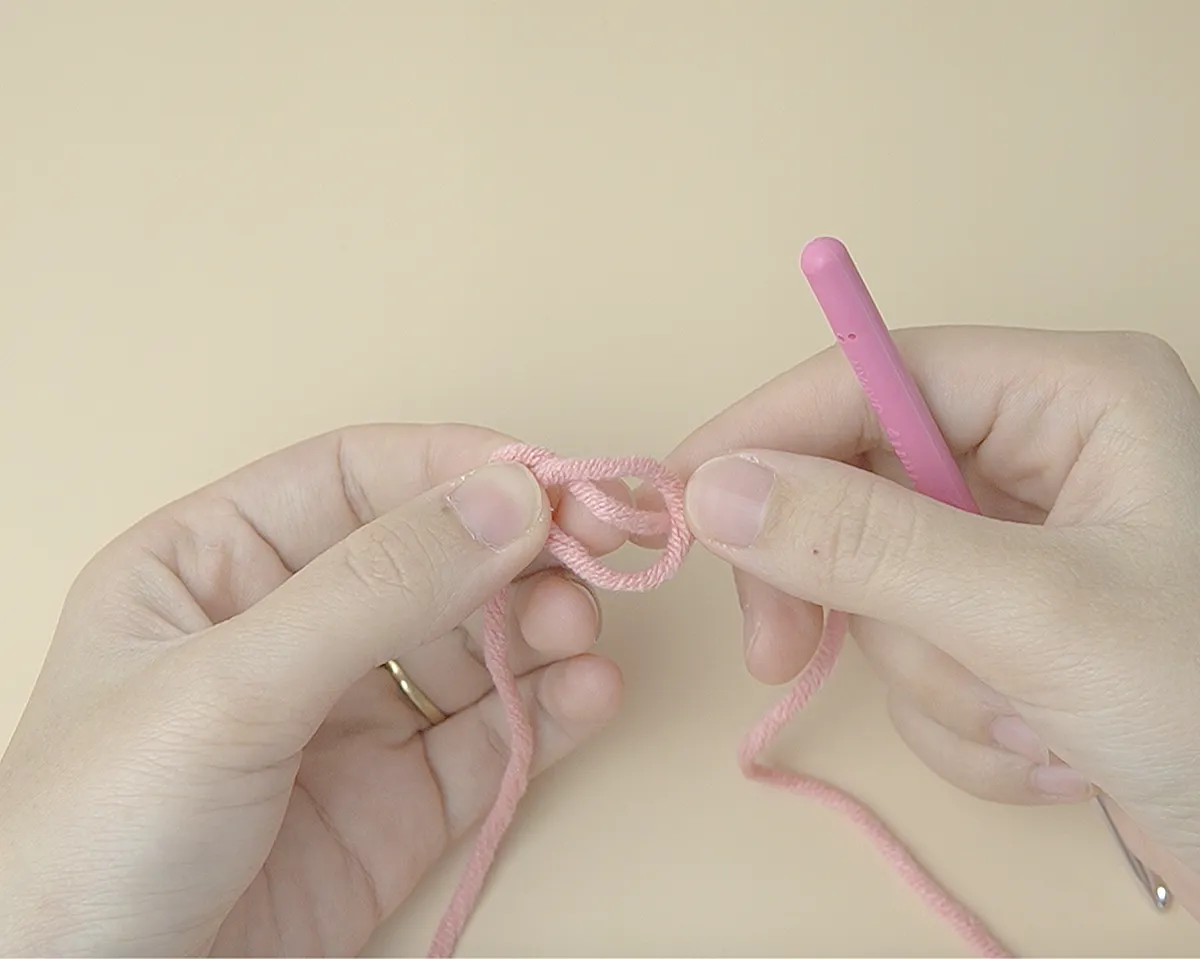
3. Insert your hook through the loop.
4. Gently tighten the knot.
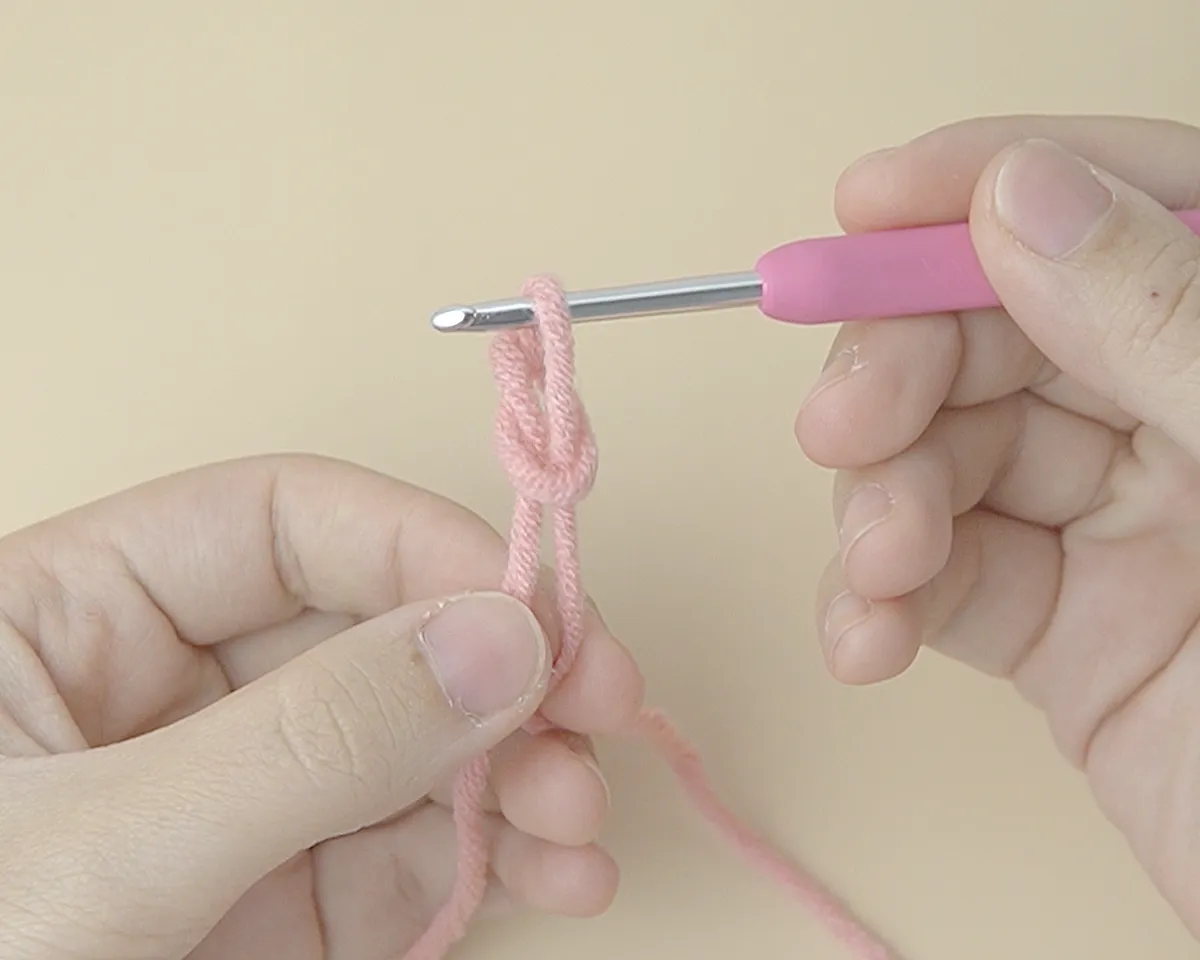
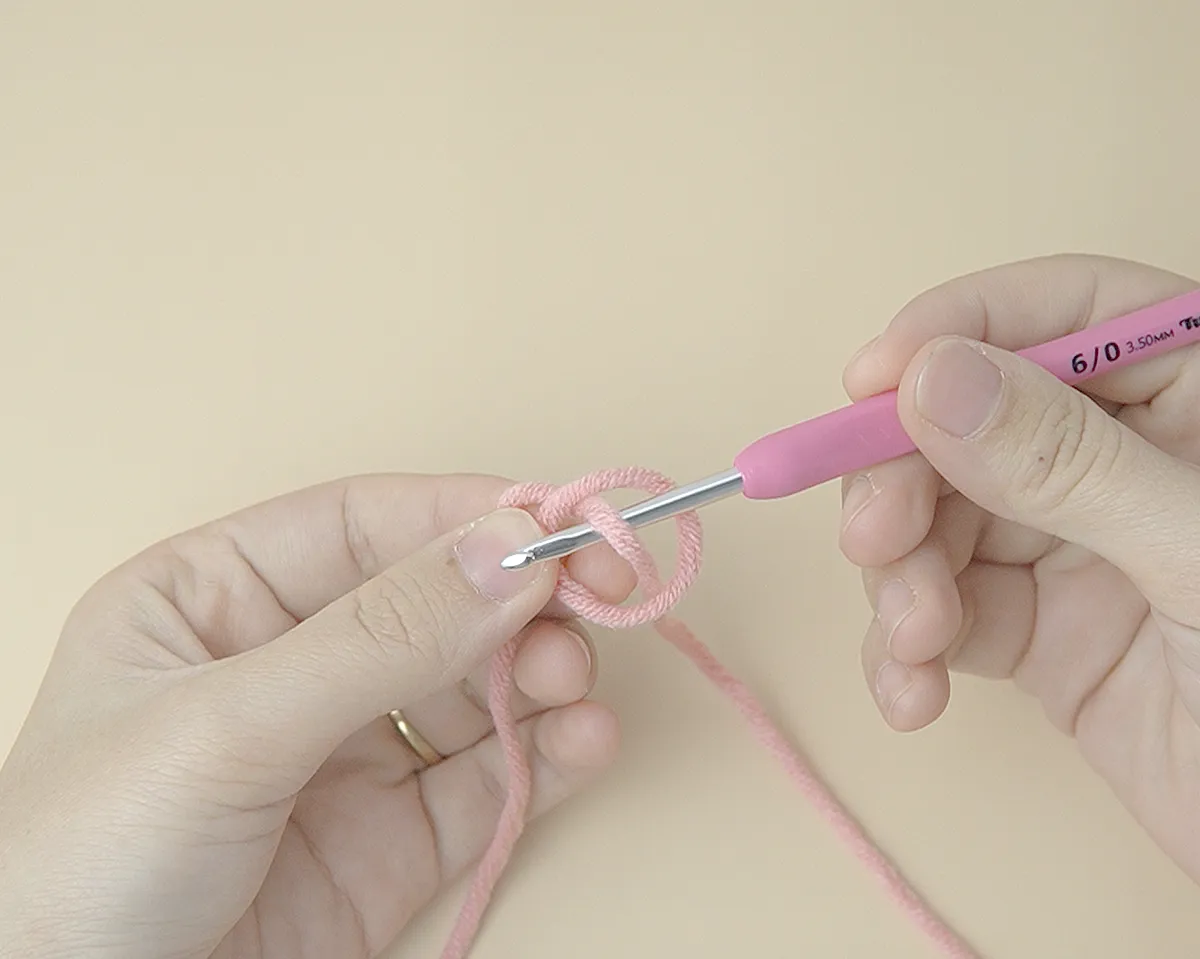
5. Your slip knot is ready.
Video tutorial: https://youtu.be/pP0PYTiABx0
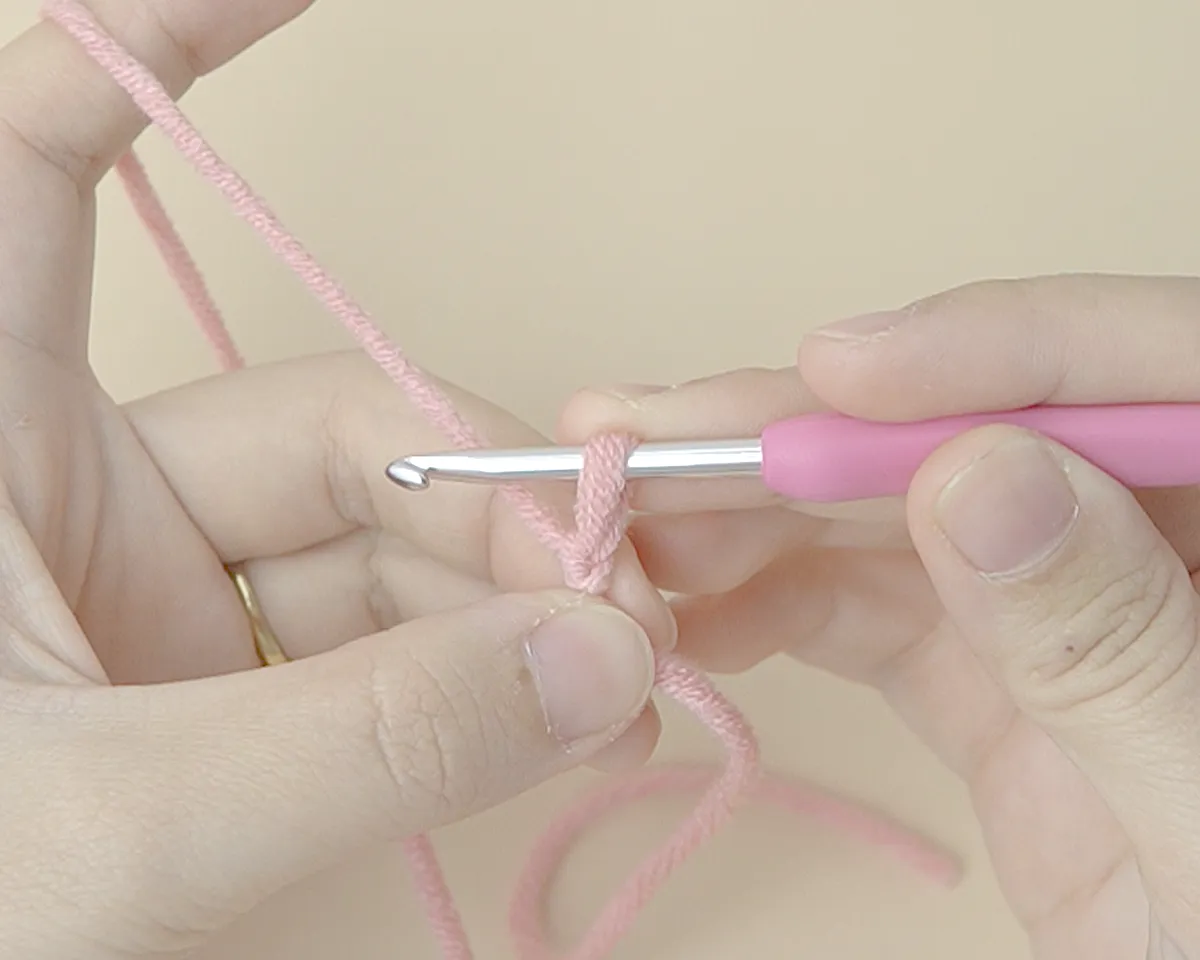
2. The Chain Stitch (abbreviation: ch)
The chain stitch is the most basic stitch in crochet. If you are a beginner, please practice making the chain stitch as many times as you can. It’s the best way to learn how to control the tension in both your left and right hands.
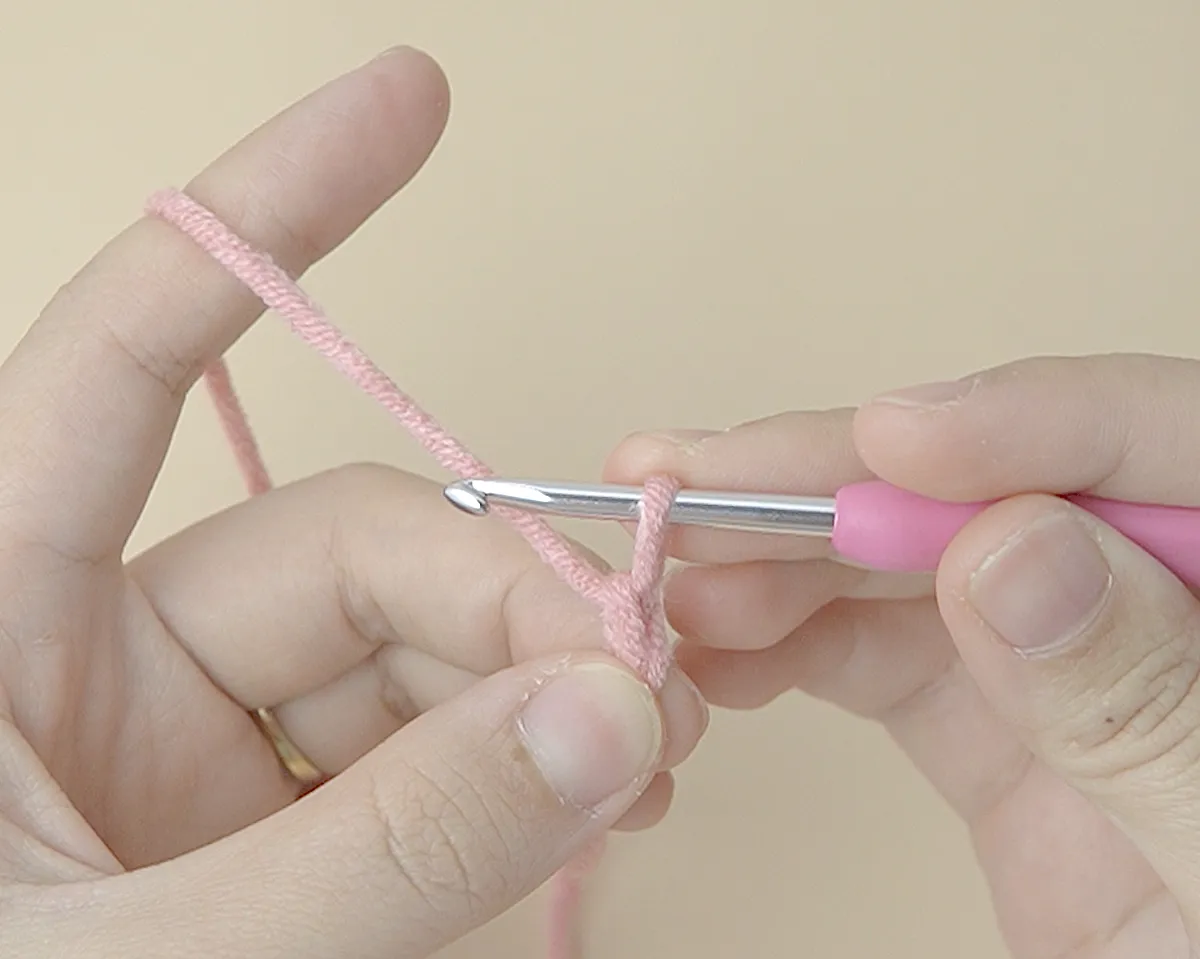
1. Make a slip knot, slide it onto your hook, and bring the hook to the front of your yarn.
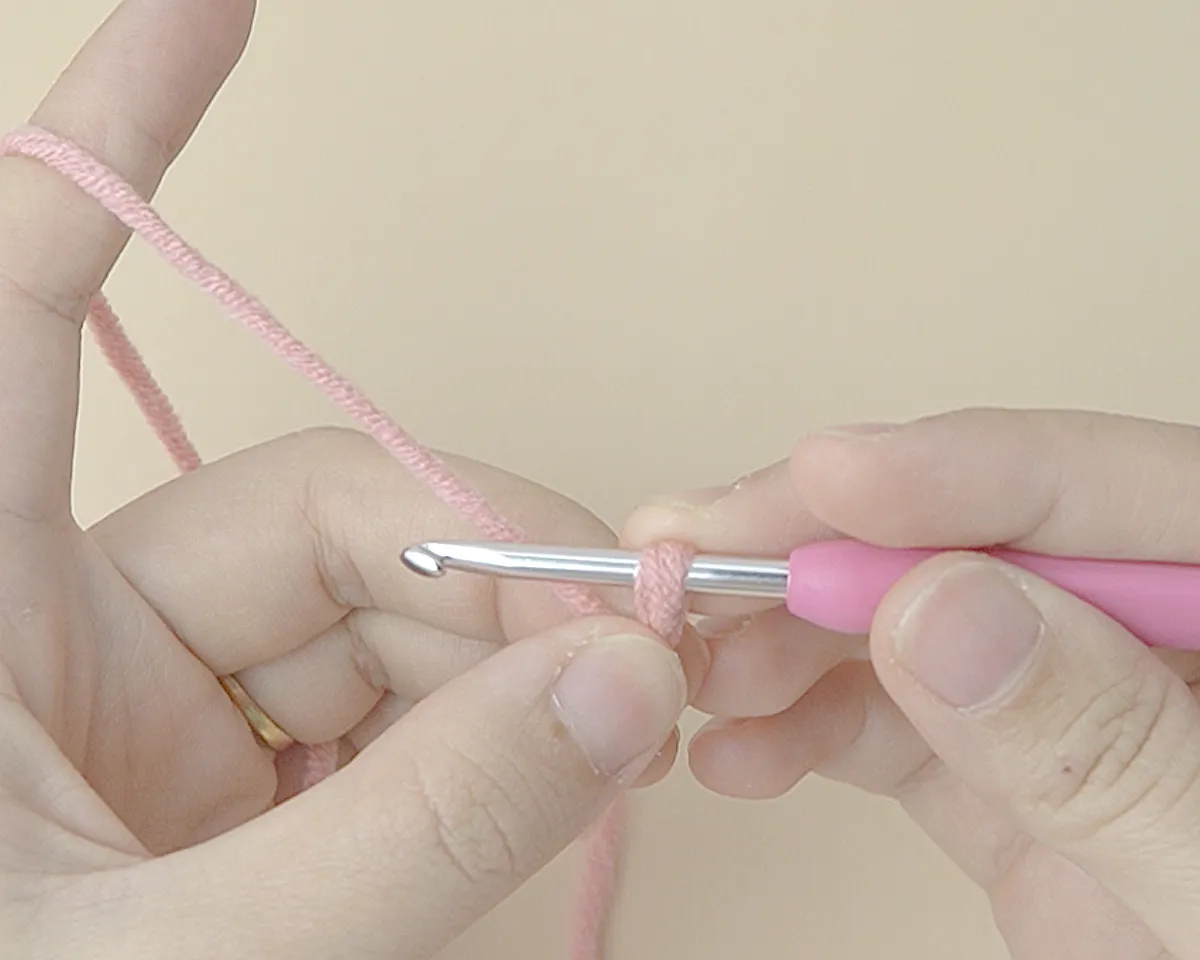
2. Move your hook from front to back.
3. Move the hook from top to down to yarn over (now there’s one loop on your hook).
4. Pull it through the loop already on the hook.
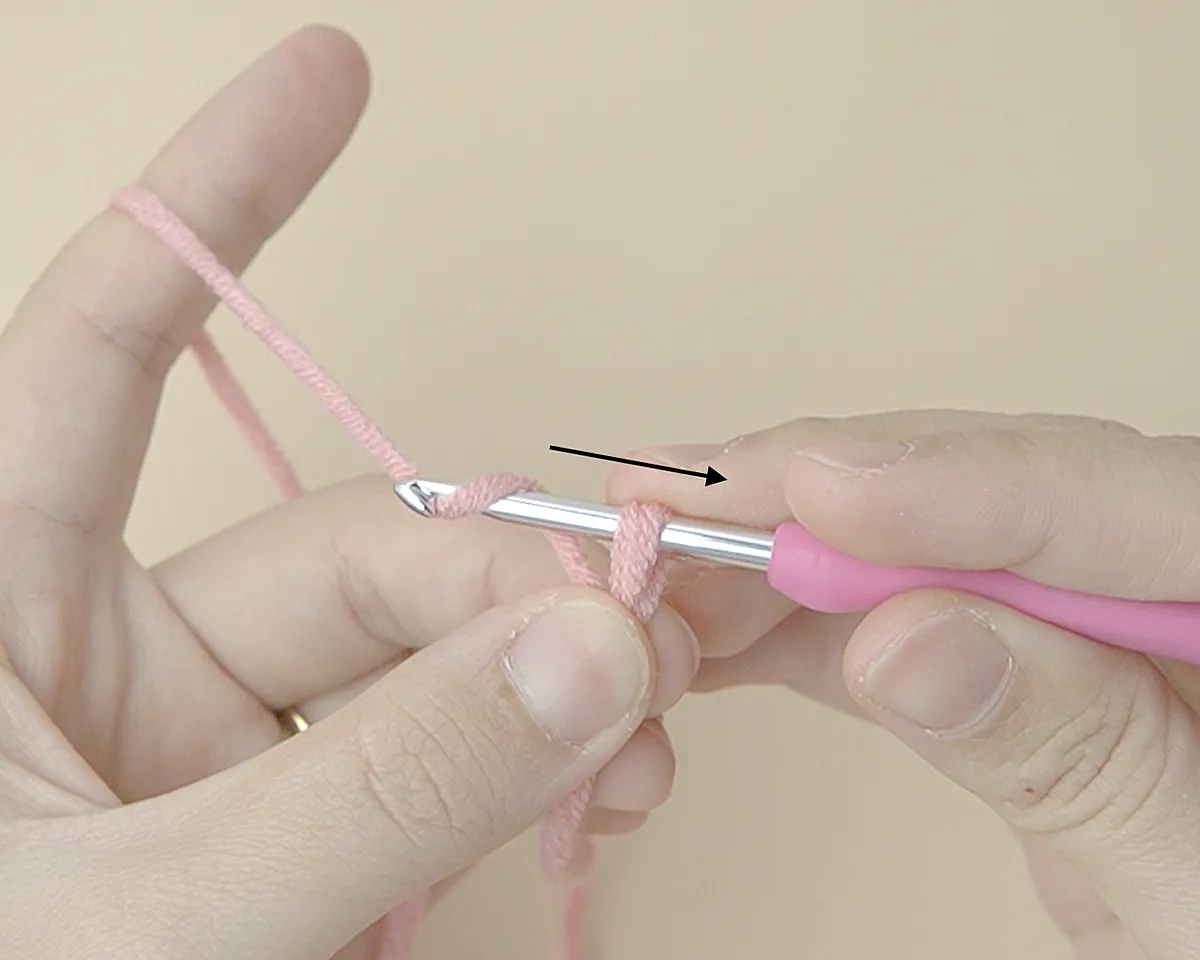
5. You’ve finished 1 chain stitch!
Video tutorial: https://youtu.be/5OKM5jAr35A
3. Counting & Anatomy of a Chain
Understanding what you’re looking at is key to keeping your stitch count accurate.
From the Front: Each chain looks like a “V” shape, and each “V” is counted as one stitch. Every “V” consists of two parts: a left loop and a right loop.
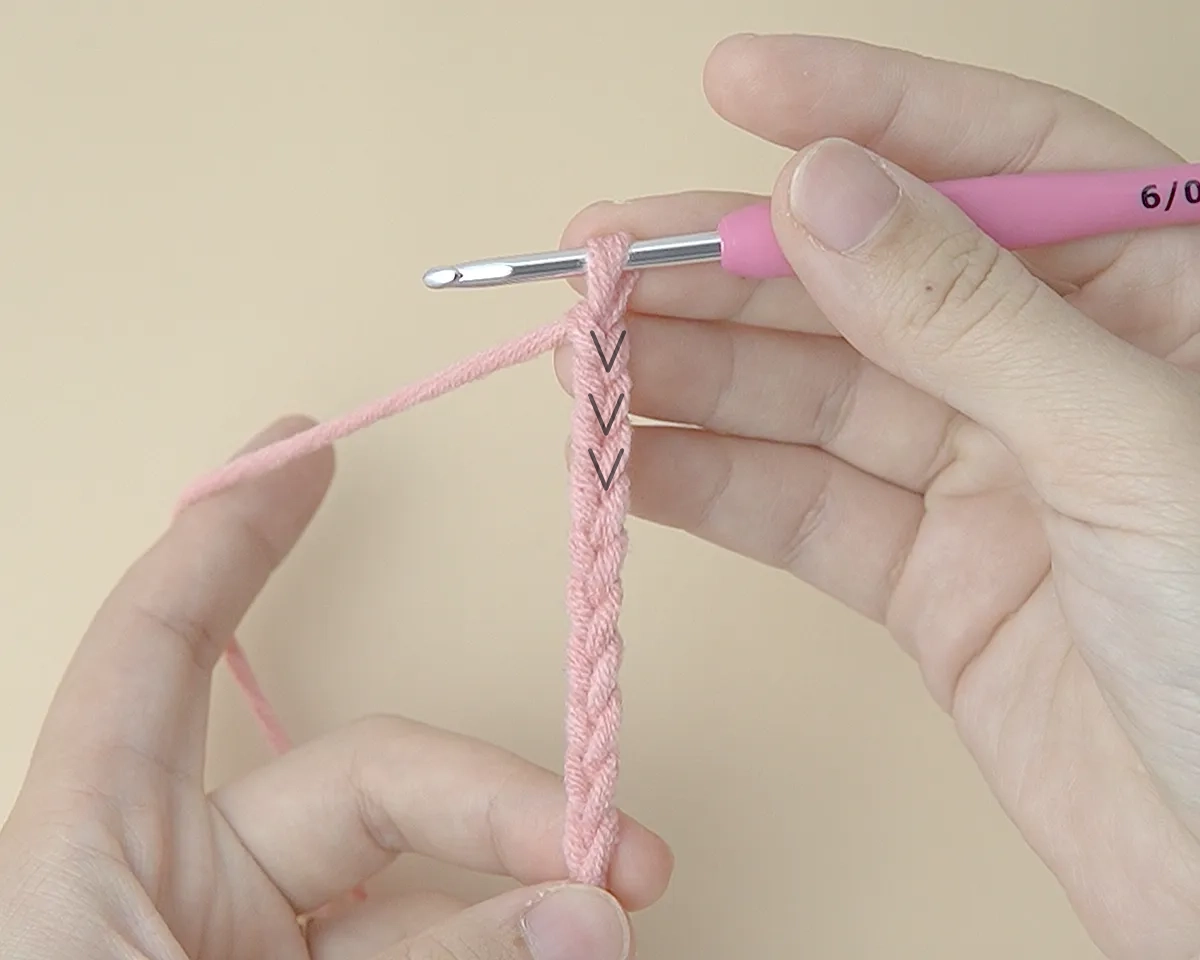
From the Back: If you flip your chain over, you’ll see a small back bump (sometimes called the “purl bump”).
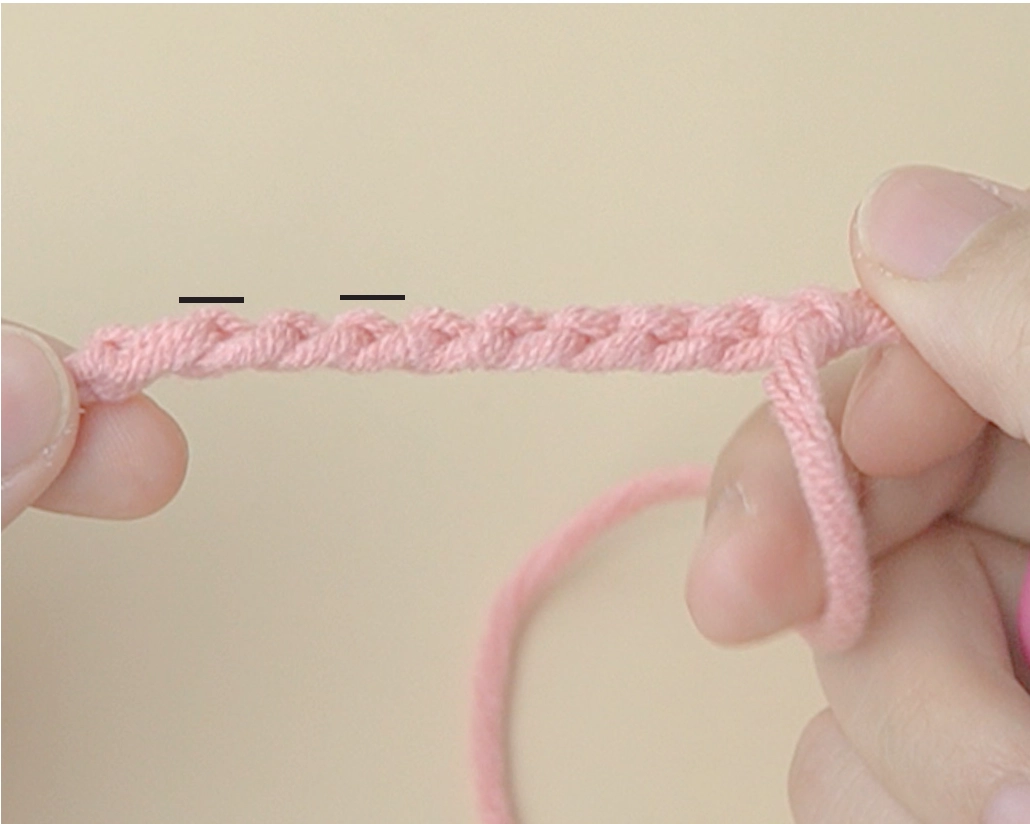
Where do you insert the hook? When making a row from a foundation chain, there are different ways to start. Personally, I usually insert my hook into the left loop only or the back bump only. This creates a much cleaner, professional-looking edge for your work.
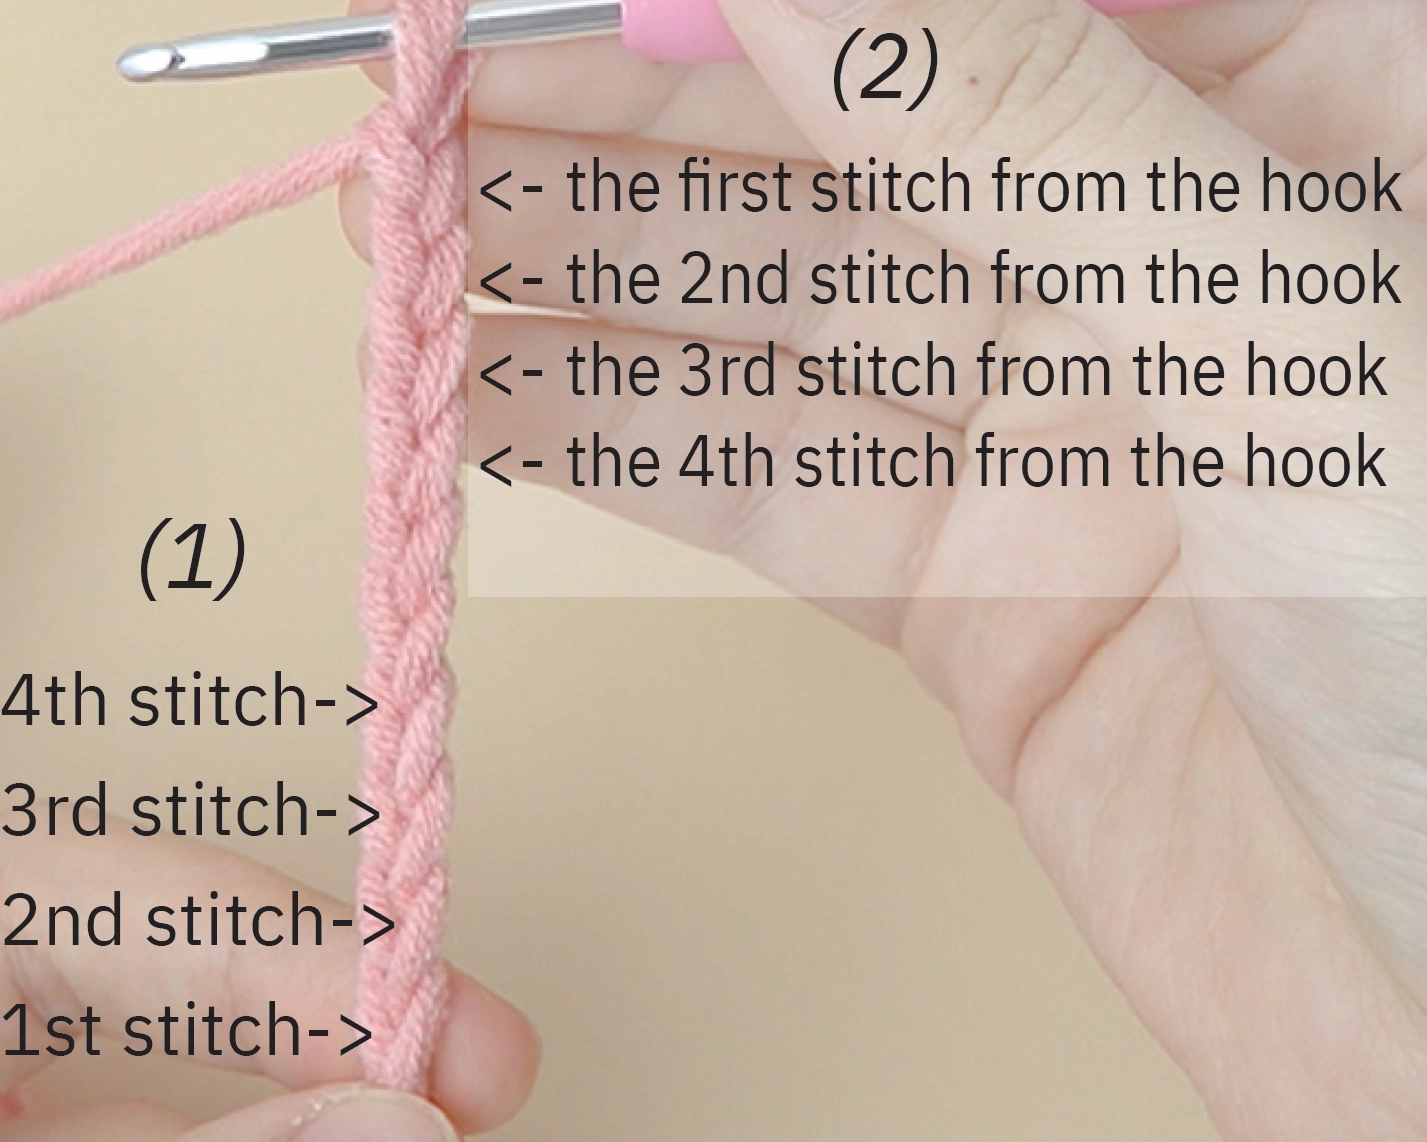
Remember: * Count the “Vs.”
- Ignore the slip knot at the very beginning.
- Ignore the loop currently on your hook.
(1) Counting stitches from the beginning.
(2) Counting stitches from the hook.
Congratulations!
You’ve officially made your first crochet chain. It might seem simple, but this is the foundation for everything we’ll build together.
Don’t rush into the next step just yet. Spend some time practicing your chains, pull them apart and start over until the “Vs” look consistent and your hands feel relaxed. Good tension is the secret to professional-looking projects!
In Crochet for Beginners 2, we’ll move from lines to shapes by learning the Single Crochet (sc) and my favorite secret for amigurumi: the “X” shape stitch.
Thanks for crocheting along with me. Happy stitching!