Say hello to Teddy Bear and Sweater Bear!
Whether you love things simple and classic or want a little extra holiday cozy charm, I’ve got you covered with two versions of the same adorable bear.

Both patterns are no-sew, and come together in under an hour. These are perfect for last minute gifts, quick stock for your market, or just a cozy little project to keep your hands busy while you watch your favorite movie.
About the Designer
This pattern comes from Mai at Petite Paws Crochet, who also happens to be my sister! She’s newer to pattern designing but already has such a sweet eye for these tiny, giftable amigurumi. We’ve been talking about starting a blog together for a while now, where we can share free patterns from both of us.
Why We Love This Pattern
Here’s why crafters are going to be obsessed with this pair:
It’s quick to make. Under an hour means you can whip up a whole basket of these for a craft fair or gift exchange without breaking a sweat.
No sewing needed. Everything works up in one piece, so you can skip the tedious assembly at the end.
Two looks, one pattern family. Start with the Classic, then customize the Cozy Sweater version in any colors you like.
Perfect for the season. Sweet, simple, and cozy, these bears are made for gifting, decorating, or selling this Christmas.
Want the Ad-Free PDF?
If you’d rather have a printable version without the ads, you can grab the premium PDF on Petite Paws Crochet’s Ravelry. It comes with clear photos and is easy to save to your phone or tablet.
Project Overview
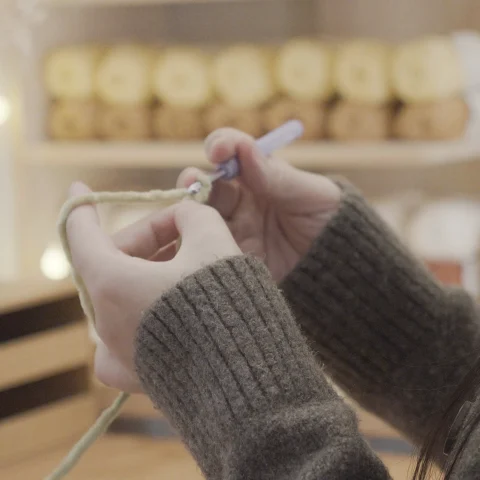
This is a no-sew pattern. First, crochet the arms. Next, crochet the body from the bottom up, attaching the arms as you go. We will surface crochet the ears later.
What You’ll Need
The pattern can be customized with different yarn weights to create smaller or larger sizes.
Bigger Size: 5.5 x 4 inc
- Yarn: Weight #6 yarn: Premier Basix Chenille
- Plain Teddy Bear: 30g brown, 5g beige, and a small amount of dark brown for the nose.
- Cozy Bear: 24g brown, 12g red, 5g beige, and a small amount of dark brown for the nose.
- Hook: 5.5mm US 9
- Eyes: Embroidered with black DK weight yarn or 9 mm black safety eyes.
Other materials and tools:
Stitches & Abbreviations (US Terms)
This pattern is written in US crochet terminology.
- Rnd: Round
- slst: Slip stitch
- sc: Single crochet
- hdc: Half double crochet
- dc: Double crochet
- inc: Increase (2 sc in one stitch)
- dec: Decrease (invisible decrease works best)
- FLO: Front loops only
- BLO: Back loops only
- Bobble-4-dc: make 4 incomplete double crochet in the same stitch then yarn over, pull through all the loops on your hook
- Bobble-5-dc: make 5 incomplete double crochet in the same stitch then yarn over, pull through all the loops on your hook
Teddy Market Prep Crochet Pattern
This is your simple, timeless teddy bear. If you want a bear that’s easy to make and easy to love, start here.

Arm (make 2)
Begin with brown yarn. Work in spiral rounds.
Rnd 1: 8 sc in the magic ring (8)
Rnd 2 – Rnd 6: 8 sc (8)

Rnd 7: Fold the arm into 1 piece then crochet: 4 sc (4)
Slst and fasten off.

Leg and body
RIGHT LEG
Begin with brown yarn. Work in spiral rounds.
Rnd 1: 5 sc in the magic ring (5)
Rnd 2: 5 inc (10)
Rnd 3 – Rnd 4: 10 sc (10)
Slst and fasten off. Put a stitch marker on 4th stitch of the right leg.

LEFT LEG: Do the same as right leg until Rnd 4. We will join 2 legs in Rnd 5.
Rnd 5: 7 sc, chain 1, 1 sc into the marked stitch on right leg, 9 sc around right leg, 1 sc into the back bump of the chain between 2 legs, 3 sc on left leg ( 22 sts total)


Rnd 6: 7 sc, 1 inc, 10 sc, 1 inc, 3 sc (24)
Rnd 7: 24 sc (24)

Rnd 8: 2 sc, 1 inc, 11 sc, 1 inc, 5 sc, 1 bobble-4-dc, 3 sc (26)
Rnd 9: 26 sc (26)
Rnd 10: 2 sc, 1 dec, 11 sc, 1 dec, 9 sc (24)
Rnd 11 – Rnd 12: 24 sc (24)

On Rnd 13, we will attach 2 arms to the body.
Rnd 13: 4 sc through the arm and the body, continue to crochet on the body: 9 sc, crochet through the arm and the body: 4 sc, continue to crochet on the body: 7 sc (24)

Rnd 14: 1 sc, 1 dec, 5 sc, 1 bobble-5-dc in beige, 5 sc, 1 dec, 8 sc (22) (Note: Tips to get a cleaner bobble stitch HERE)
Rnd 15 – Rnd 16: 22 sc (22)
Rnd 17: 1 sc, 1 dec, 10 sc, 1 dec, 7 sc (20)
Place the eyes between Rnd 14 and Rnd 15, 1 st apart from the muzzle. Since I’m using pretty small eyes, I will glue them on later. You can embroider the eyes with black worsted acrylic yarn instead when the body is finished. Stuff the bear.
Rnd 18: 10 dec (10)
Slst and fasten off. Weave the yarn tail through the front loop then pull to close the hole. Make a knot to make it more secure and weave the yarn tail.


Ears
Mark 2 stitches on Rnd 15, the distance between 2 stitches is 9 sts.

Pull yarn through marked stitch, chain 2, crochet 2 hdc into the marked stitch, then chain 2 and slst into the marked stitch. Weave the yarn tail.


Sew the nose on the muzzle (made of bobble stitch) with dark brown yarn.


Christmas Bear
Once you’ve made the Classic, you’re only one small change away from the Cozy Sweater Bear! This version uses the exact same construction, the only difference is you’ll change the yarn color on the body to create the look of a knit sweater.
That means you can customize the sweater however you like. Christmas red and white, cozy forest green, or your own favorite color combo, it’s completely up to you. This little trick makes the pattern feel brand new every time you switch colors.

Arm (make 2)
Begin with brown yarn. Work in spiral rounds.
Rnd 1: 8 sc in the magic ring (8)
Rnd 2: 8 sc (8)
Change to beige yarn.
Rnd 3: BLO 8 sc (8)
Change to red yarn.

Rnd 4: BLO 8 sc (8)
Rnd 5: 8 sc (8)
Rnd 6: Fold the arm into 1 piece then crochet: 4 sc (4)
Slst and fasten off.


Leg and body
RIGHT LEG
Begin with brown yarn. Work in spiral rounds.
Rnd 1: 5 sc in the magic ring (5)
Rnd 2: 5 inc (10)
Rnd 3 : 10 sc (10)
Slst and fasten off. Put a stitch marker on 4th stitch of the right leg.

LEFT LEG: Do the same as right leg until Rnd 3. We will join 2 legs in Rnd 4.
Rnd 4: 7 sc, chain 1, 1 sc into the marked stitch on right leg, 9 sc around right leg, 1 sc into the back bump of the chain between 2 legs, 3 sc on left leg (21 sc + 1 chain = 22 sts total)


Rnd 5: 7 sc, 1 inc, 10 sc, 1 inc, 3 sc (24)
Rnd 6: 2 sc, 1 inc, 10 sc, 1 inc, 10 sc (26)

Change to beige yarn.
Rnd 7: BLO 22 sc, 1 bobble-4-dc in brown, 3 sc (26)


Change to red yarn.
Rnd 8: BLO 26 sc (26)
Rnd 9: 1 sc, 1 dec, 11 sc, 1 dec, 10 sc (24)
Rnd 10: 24 sc (24)

On Rnd 11, we will attach 2 arms to the body
Rnd 11: 4 sc through the arm and the body, continue to crochet on the body: 9 sc, crochet through the arm and the body: 4 sc, continue to crochet on the body: 7 sc (24)


Change to beige yarn.
Rnd 12: BLO 2 sc, 1 dec, 9 sc, 1 dec, 9 sc (22)
Change to brown yarn.
Rnd 13: BLO 7 sc, 1 bobble-5-dc, 14 sc (22)

Rnd 14: 22 sc (22)
Rnd 15: 1 sc, 1 dec, 9 sc, 1 dec, 8 sc ( 20)
Rnd 16 – Rnd 17: 20 sc (20)
Place the eyes between Rnd 14 and Rnd 15, 1 st apart from the muzzle. Since I’m using pretty small eyes, I will glue them on later. You can embroider the eyes with black worsted acrylic yarn instead when the body is finished. Stuff the bear.
Rnd 18: 10 dec ( 10)
Slst and fasten off. Weave the yarn tail through the front loop then pull to close the hole. Make a knot to make it more secure and weave the yarn tail.


Ears
Mark 2 stitches on Rnd 15, the distance between 2 stitches is 9 sts.

Pull yarn through marked stitch, chain 2, crochet 2 hdc into the marked stitch, then chain 2 and slst into the marked stitch.


Sew the nose on the muzzle (made of bobble stitch) with dark brown yarn.


I’d love to see your finished teddy bears! Tag me @petitepawscrochet on Instagram or use #petitepawscrochet so I can share your work.
Thank you for crocheting with me today! If you love cute crochet patterns like this one, make sure to join my newsletter for crochet tips, and new pattern updates delivered straight to your inbox. I can’t wait to crochet with you again!
You can find more crochet patterns in our Ravelry shops.
For more inspiration and behind-the-scenes contents, join me over on Instagram or Facebook!
Happy Crocheting!
This post may contain affiliate links. View our disclosure policy here.
Copyright © 2026 Green Frog Crochet & Petite Paws Crochet. All rights reserved. Please do not redistribute or sell this pattern as your own. You are welcome to sell finished items made from this pattern.