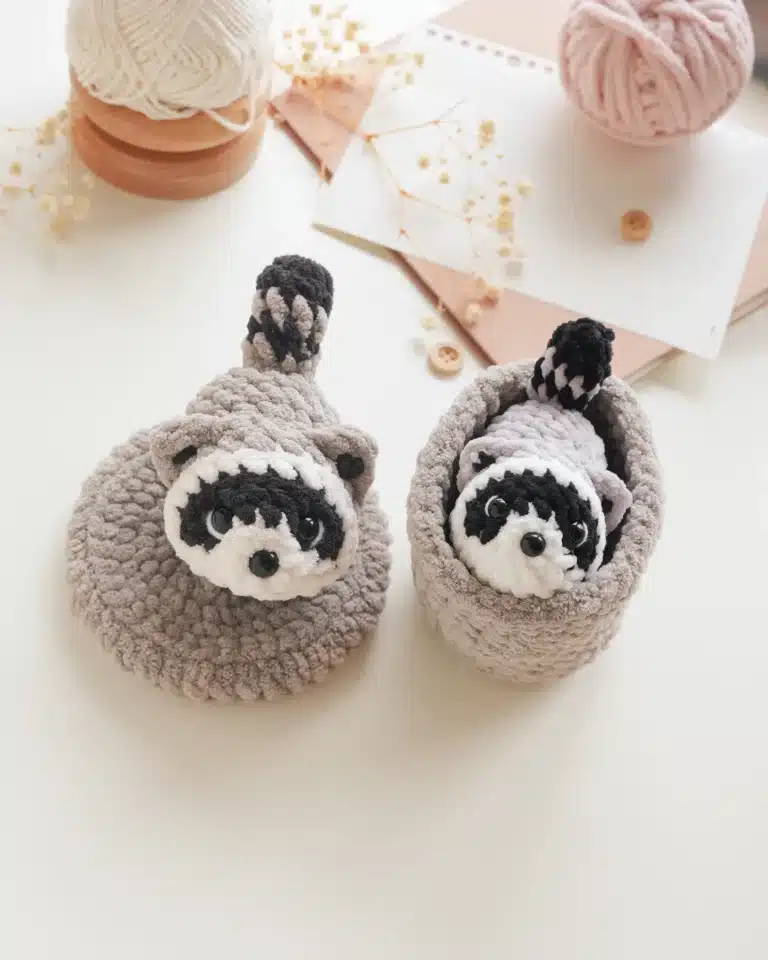
Hi friends! I have big news. A new hatching animal is coming, and this time it’s a raccoon.
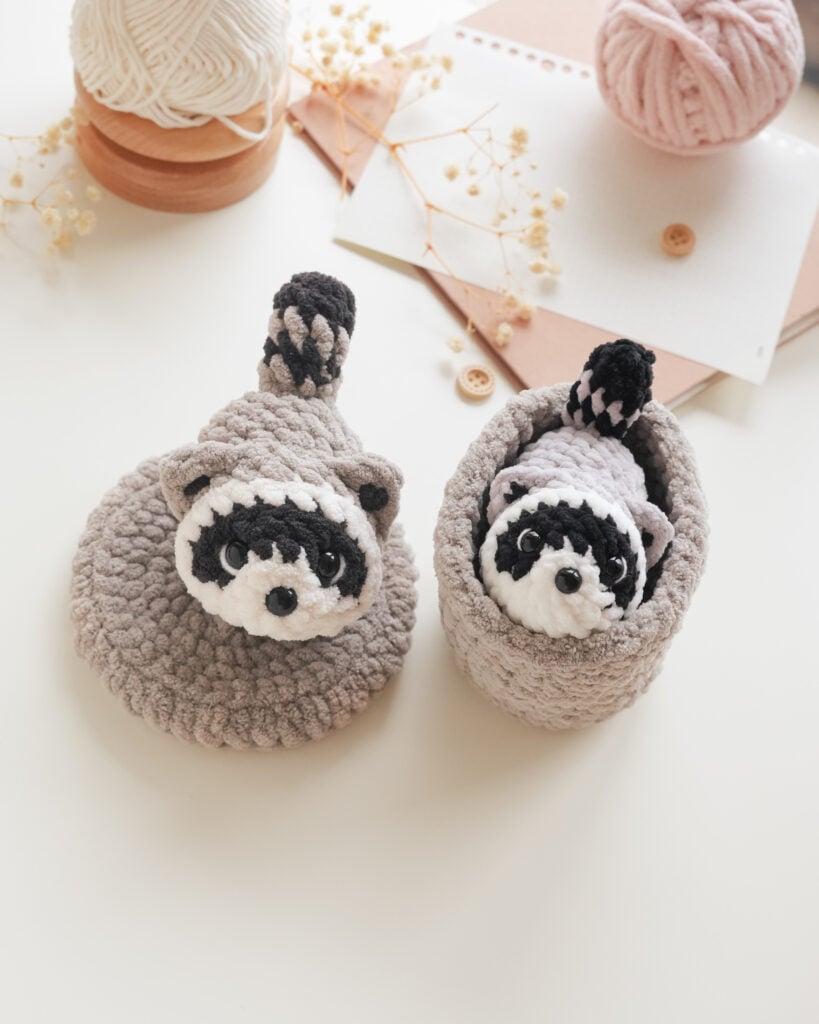
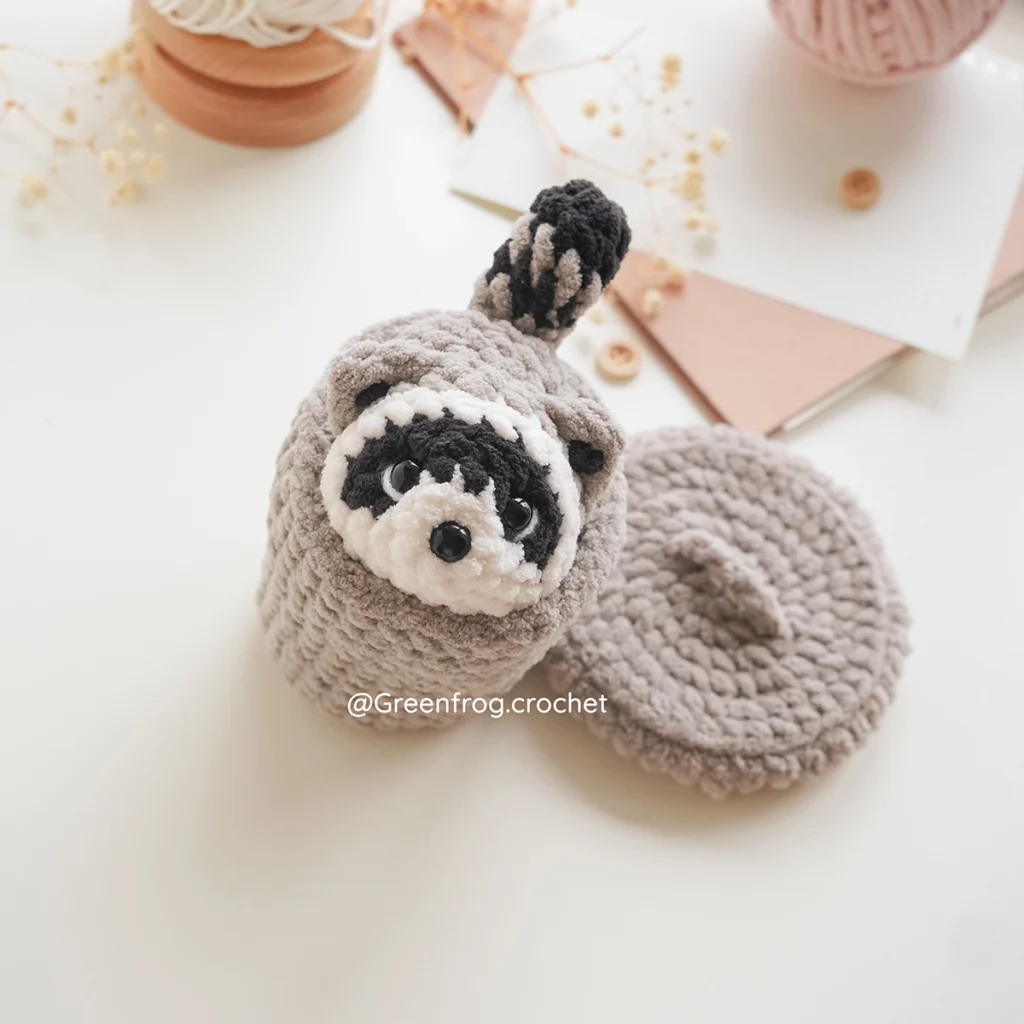
You all know I love hatching animal patterns. There is something so cute about a little animal popping out of an egg. I wanted to make a raccoon in a trash can a long long time ago. And when the “Jimothy” raccoon trend became so popular everywhere, I knew I had to make one too. So here he is, peeking out of his little trash can, just like a real raccoon would do. 🦝
Quick Review
Cute overload!!!
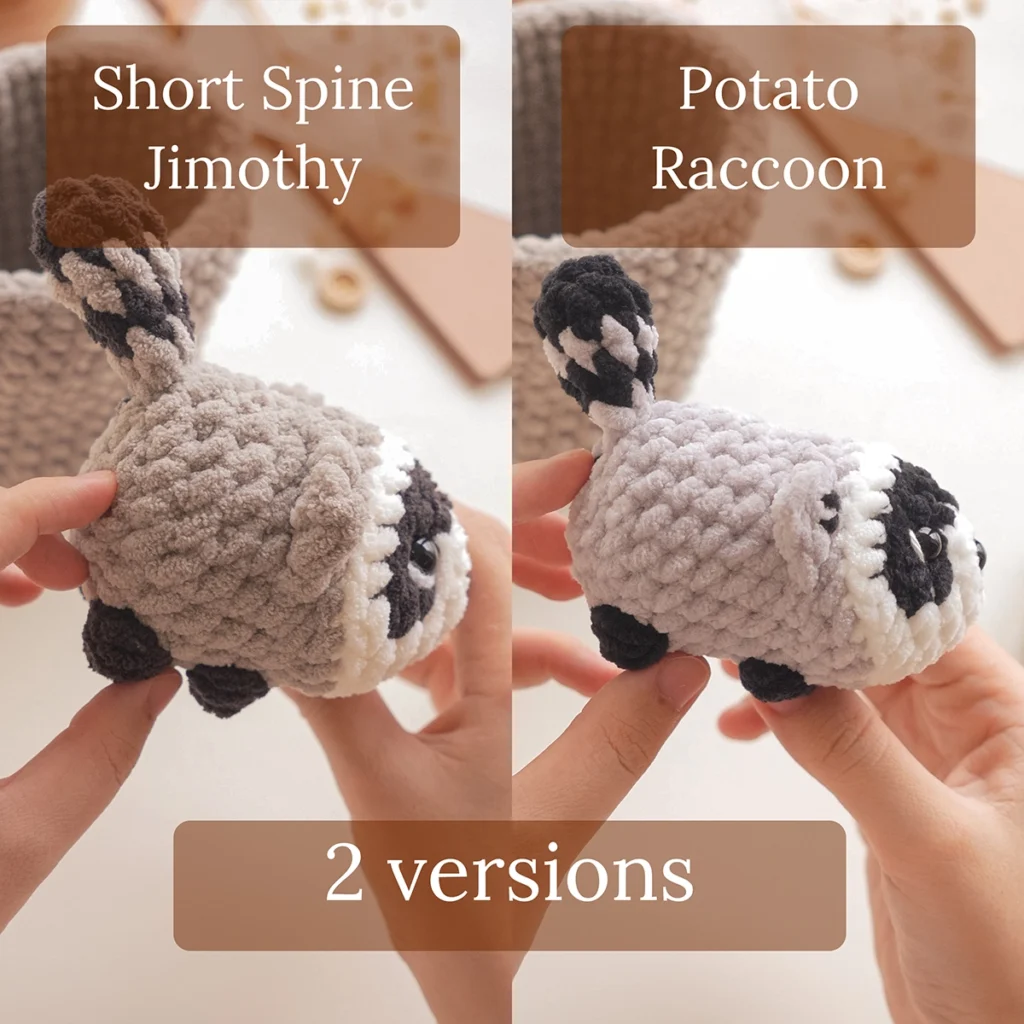
Two Body Shapes to Choose From
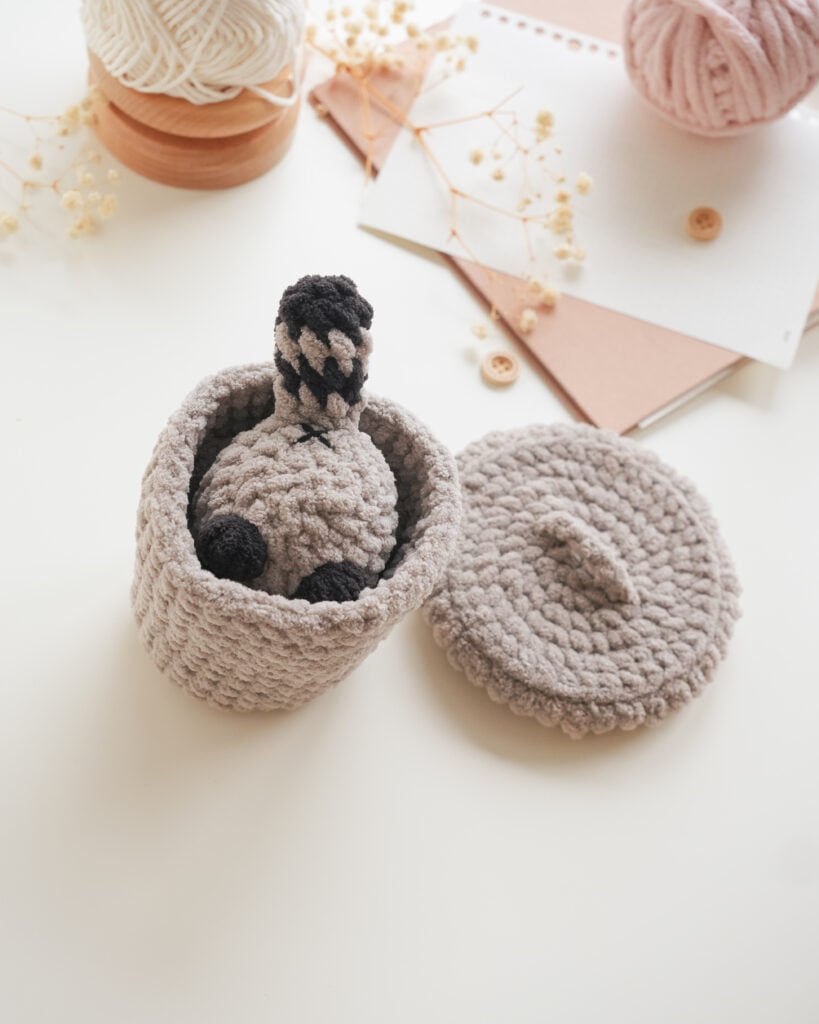
I made two versions of the raccoon, of course, Jimothy has to have a friend, right?
Short Spine Version This one is small and round. He looks chunky and stubby, with short body, same as Jimothy.
Long Body Potato Version This one has a longer, oval shape body, like a loafy raccoon.
No-Sew Pattern
I know many of you don’t like sewing pieces together at the end. That’s why this pattern is no-sew! Everything connects as you crochet, so there is no separate sewing step for arms or ears.
What’s Included
- Trash Can Pattern
- Full pattern for both body versions
Get Free Patterns Straight to Your Inbox
If you love free patterns like this one, come join my newsletter! I share new designs, crochet tips, and the occasional sweet deal. No spam, I promise. Just the good stuff every now and then.
Want the Ad-Free PDF?
If you’d rather have a printable version without the ads, you can grab the premium PDF on my website. It comes with clear photos and is easy to save to your phone or tablet.
Project Overview
Quick tip before we dive in: keep your stitches nice and tight so the stuffing stays hidden inside. We’ll be working in a continuous spiral with no joining rounds.
I always suggest skimming through the full pattern before you start. It really does make the whole process smoother!
What You’ll Need
The pattern can be customized with different yarn weights to create smaller or larger.
Trash Can:
- Finished Size: 12 cm ~ 5 inc
- Yarn: #6 Bernat Blanket
- Quantity: Pale gray – 80g.
- Hook: 5.5mm US 9
Raccoon:
- Finished Size: Without tail: 10 cm ~ 4 inc
- Yarn: #6 Bernat Blanket
- Quantity: Pale gray – 25g, Chocolate – 10g, Vintage white – 6g
- Hook: 5.5mm US 9
- Safety eyes: 12 mm x 3 pieces
Other materials and tools:
Stitches & Abbreviations (US Terms)
This pattern is written in US crochet terminology.
- Rnd: Round
- slst: Slip stitch
- sc: Single crochet
- hdc: Half double crochet
- dc: Double crochet
- inc: Increase (2 sc in one stitch)
- dec: Decrease (invisible decrease works best)
- FLO: Front loops only
- BLO: Back loops only
Trash Can Pattern
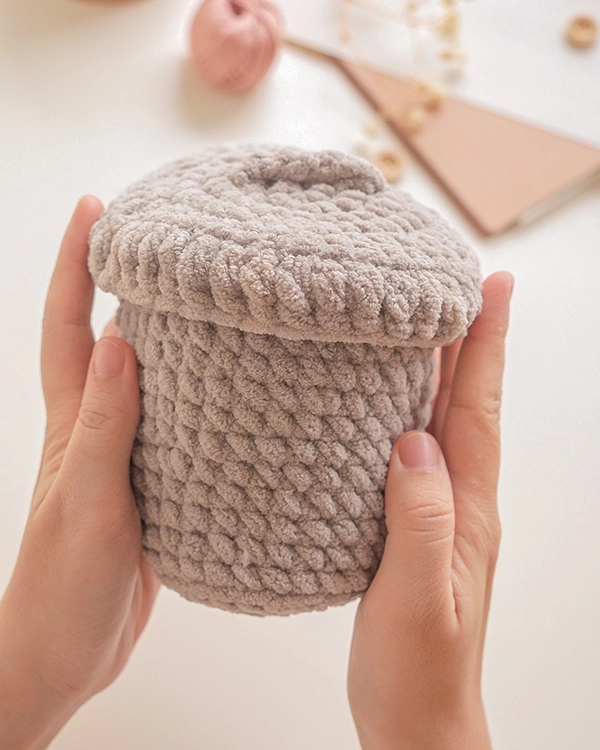
Use a hook 0.5 – 1 mm larger than the one you used for the raccoon
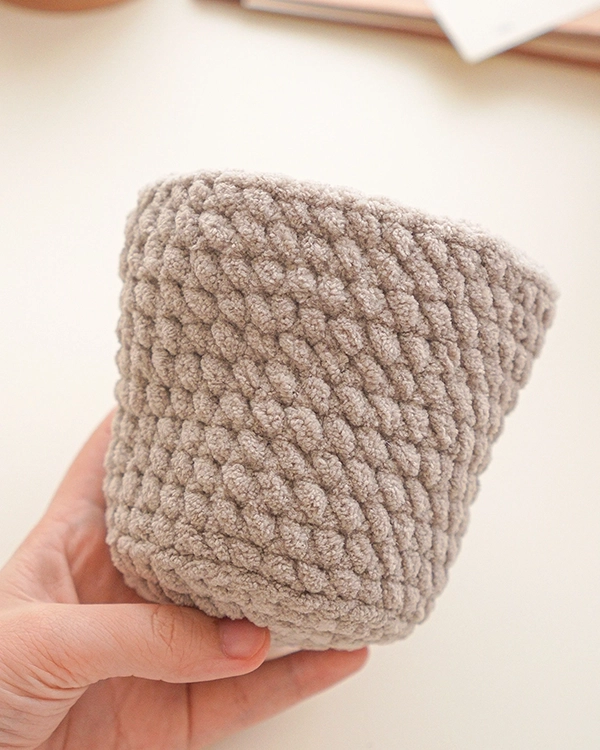
Bottom part
Begin with gray. Work in spiral rounds.
Rnd 1: 8 sc in the magic ring [8]
Rnd 2: 8 inc [16]
Rnd 3: (1 sc, 1 inc) * repeat 8 times [24]
Rnd 4: (3 sc, 1 inc) * repeat 6 times [30]
Rnd 5: BLO 30 sc [30]
Rnd 6 – Rnd 8: 30 sc [30] [3 Rounds]
Rnd 9: (9 sc, 1 inc) * repeat 3 times [33]
Rnd 10 – Rnd 11: 33 sc [33] [2 Rounds]
Rnd 12: 5 sc, 1 inc, (10 sc, 1 inc) * repeat 2 times, 5 sc [36]
Rnd 13 – Rnd 15: 36 sc [36] [3 Rounds]
Slst and fasten off. Weave in the yarn tail.
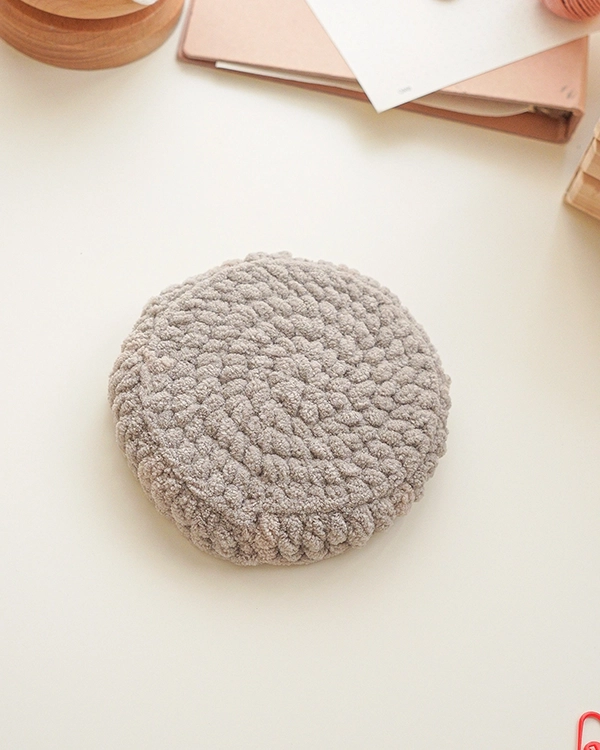
Lid
Begin with gray. Work in spiral rounds.
Rnd 1: 8 sc in the magic ring [8]
Rnd 2: 8 inc [16]
Rnd 3: (1 sc, 1 inc) * repeat 8 times [24]
Rnd 4: (2 sc, 1 inc) * repeat 8 times [32]
Rnd 5: (3 sc, 1 inc) * repeat 8 times [40]
Rnd 6: 40 sc [40]
Slst in the next stitch. Chain 1.
Rnd 7: BLO 40 hdc, slst to close the round and fasten off. [40]
Handle of the lid
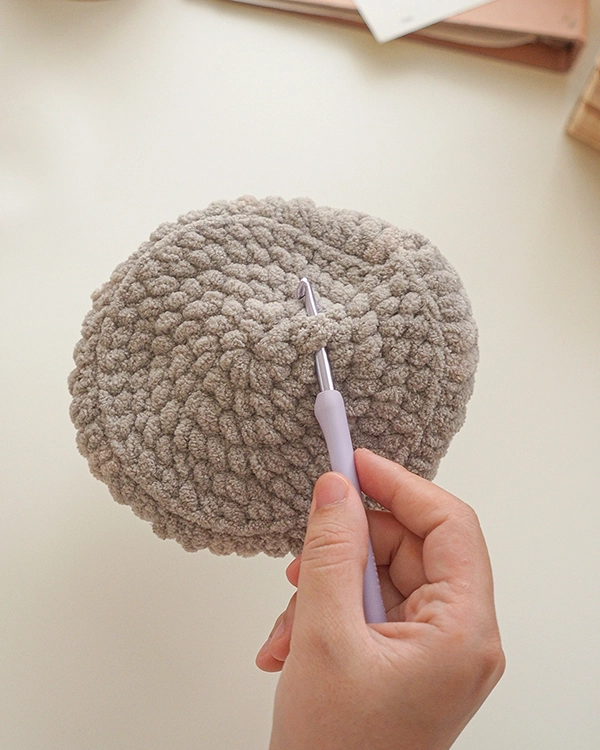
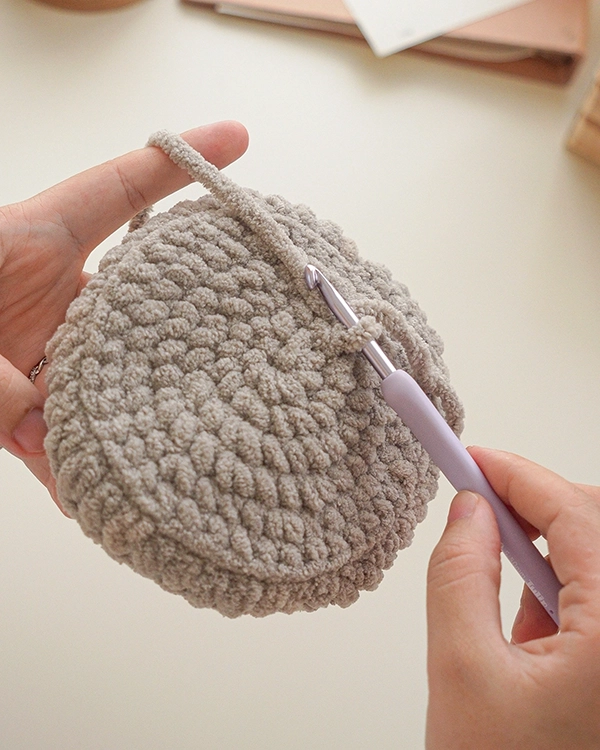
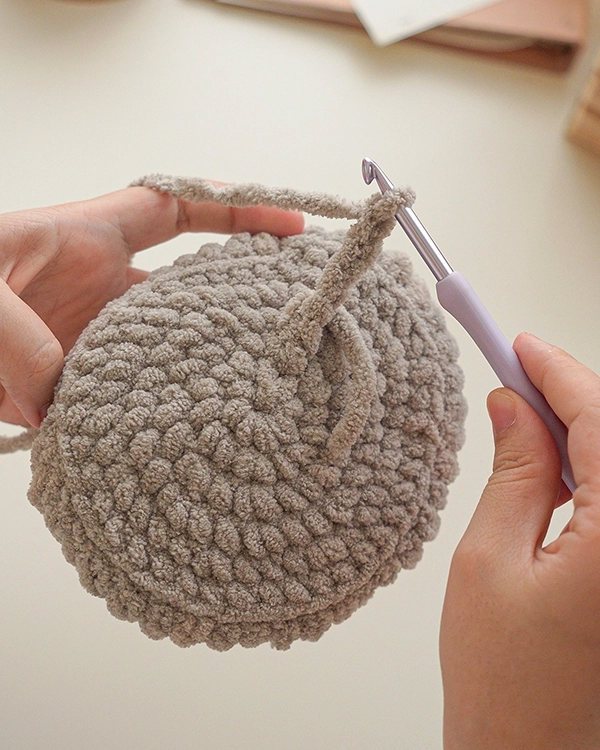
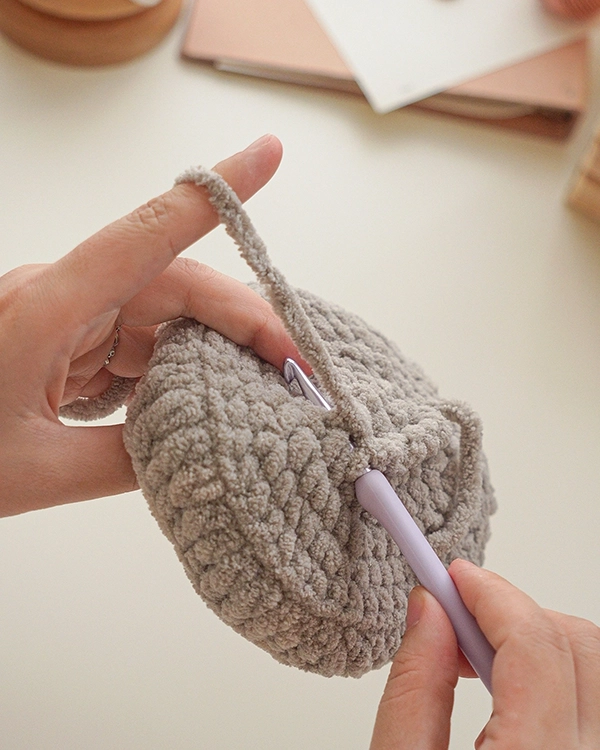
Attach gray yarn in Rnd 2 of the lid, chain 5 and slst into the stitch directly across from your starting point of Rnd 2 of the lid. Fasten off and weave the yarn tail.
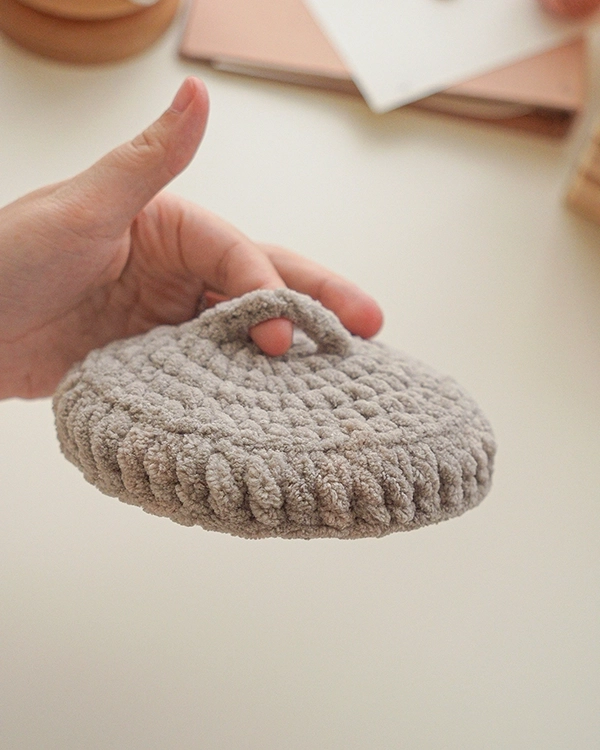
Jimothy The Short Spine Raccoon
Tail
Work in spirals, begin with black yarn.
Rnd 1: 8 sc in the magic ring [8]
Rnd 2: 8 sc [8]
Change to gray.
Rnd 3: 8 sc [8]
Change to black.
Rnd 4: 8 sc [8]
Change to gray
Rnd 5: (2 sc, 1 dec) * repeat 2 times [6]
Fasten off, do not close. Do not stuff the tail.
Head and Body
Begin with white. Work in spiral rounds.
Color abbreviation: Black:(B), White: (W).
For example, if the pattern said:
[B 2 sc], [W 4 sc] => In this round, you will crochet 2 sc in Black (B) yarn, then change to White (W) yarn and work 4 sc.
Rnd 1: 8 sc in the magic ring [8]
Rnd 2: [W 2 sc, 1 inc], [B work in BLO: 3 sc in the same stitch, 2 sc, 3 sc in the same stitch], [W work through both loops: 1 inc] [14]
Rnd 3: [W 3 sc, 1 inc], [B 3 sc in the same stitch, 6 sc, 3 sc in the same stitch ], [W 1 inc, 1 sc] [20]
From now on, crochet all stitches in white.
Rnd 4: 5 sc, BLO (1 inc, 10 sc, 1 inc), continue to work through both loops: 3 sc [22]
Change to gray.
Rnd 5: BLO 22 sc [22]
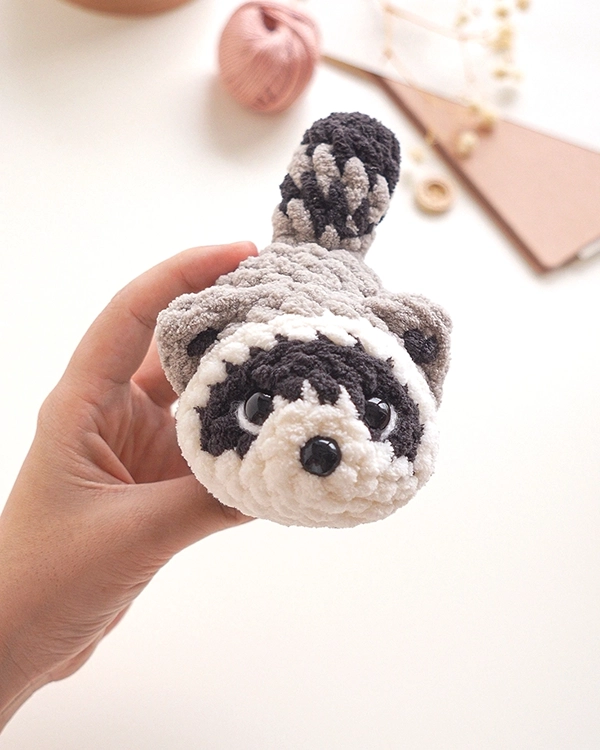
Place the safety eyes on both sides of the head, between Rnd 2 and Rnd 3, with ~3 sts in between. Place the nose (same size as the safety eyes) in the center of Rnd 1.
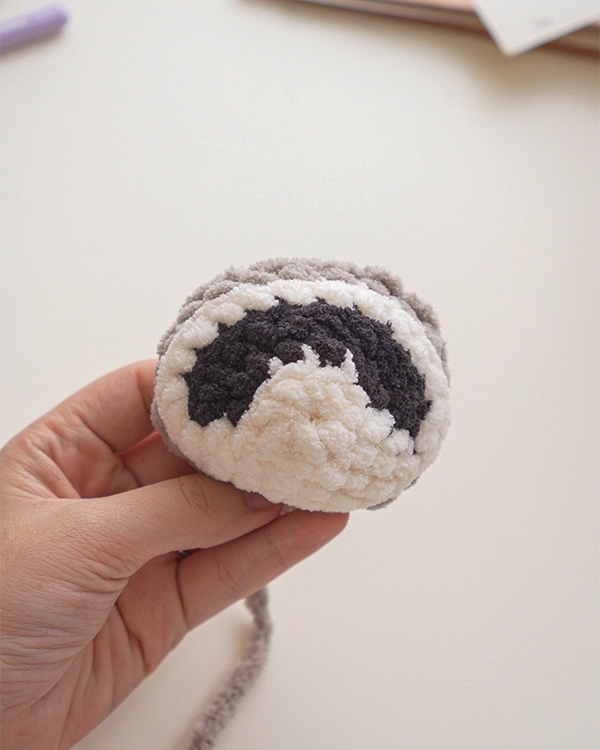
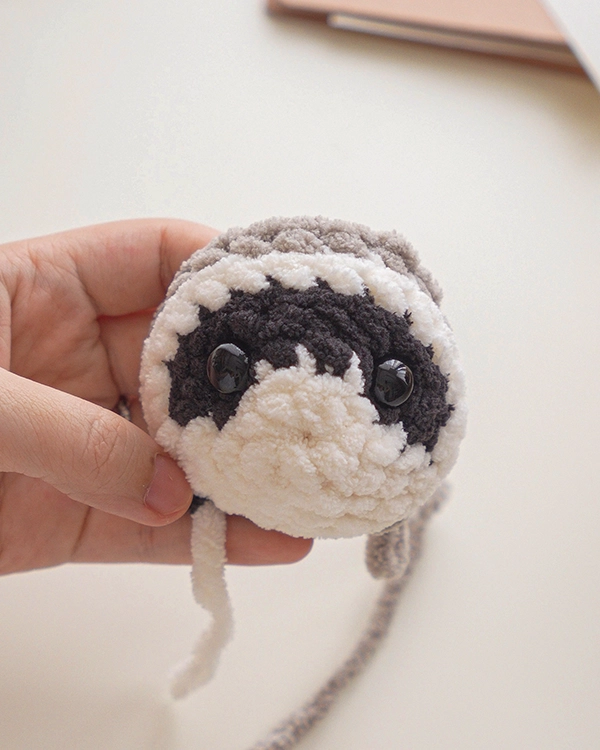
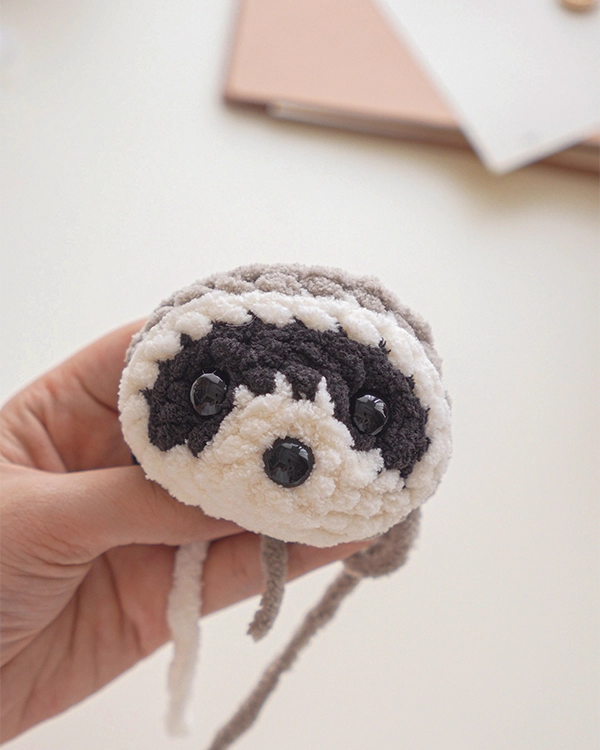
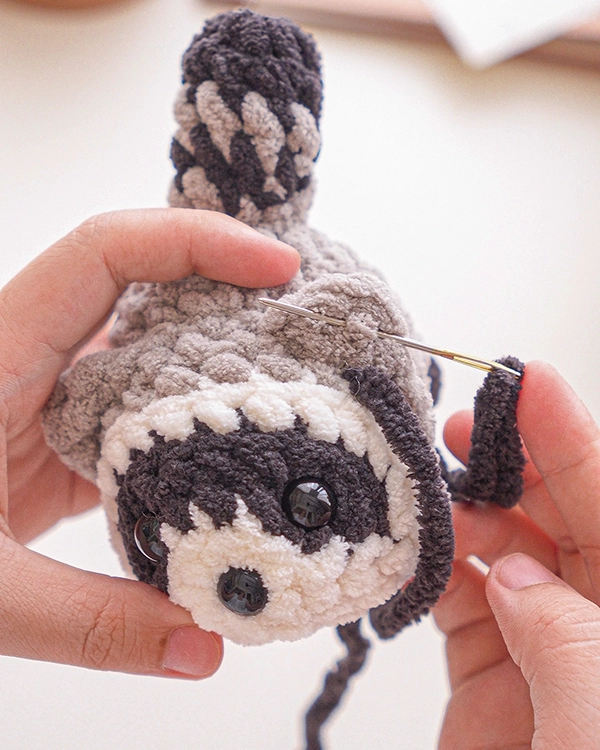
On Rnd 6, we will crochet the ears for the raccoon. The ears will be crocheted into the front loops only, please place stitch markers on the back loops of Rnd 5, stitches 9-11 and 15-17, to make Rnd 7 easier to crochet.
Rnd 6: 3 sc, 2 dec, 1 sc, work the first ear in FLO: slst in the next stitch, (1 hdc, 1 dc, 1 hdc) in the same next stitch, slst in the next stitch, continue to crochet through both loops: 3 sc , work the second ear in FLO: slst in the next stitch, (1 hdc, 1 dc, 1 hdc) in the same next stitch, slst in the next stitch , continue to crochet through both loops: 1 sc, 2 dec [18]
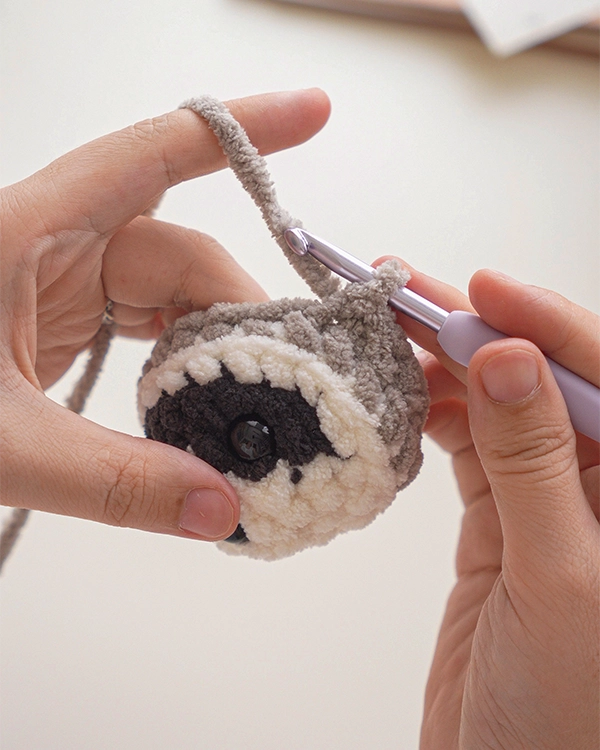
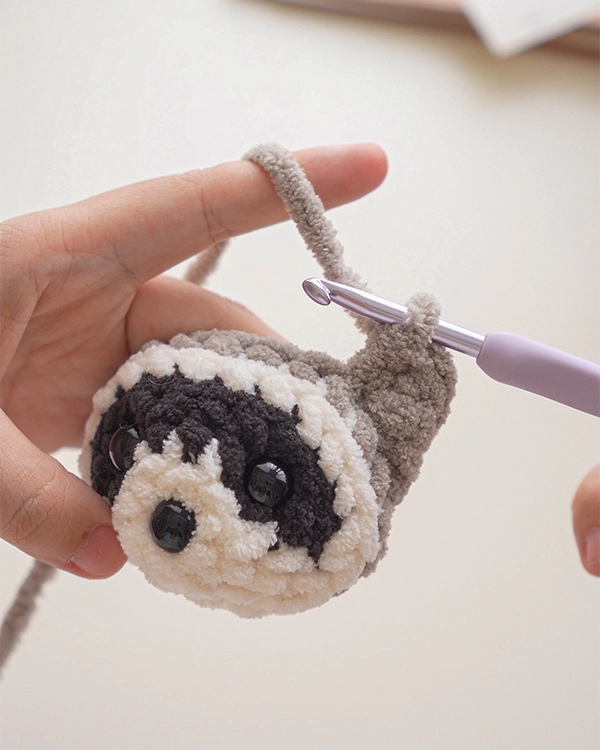
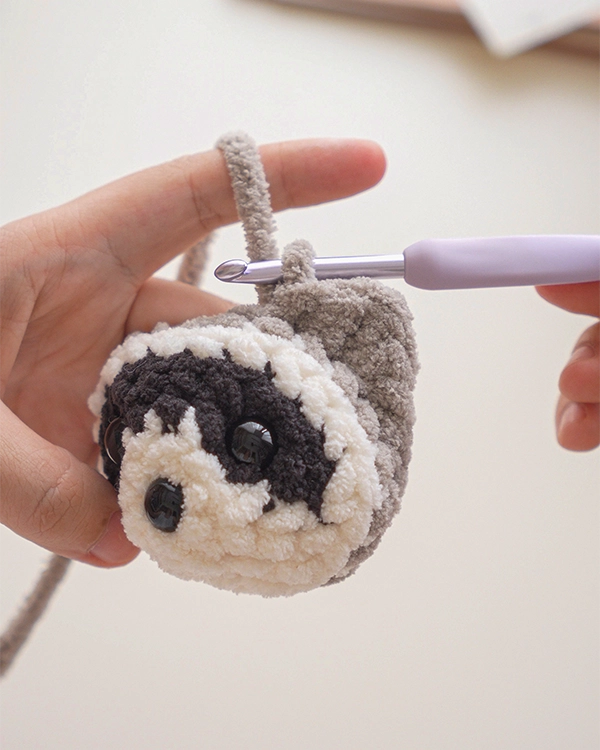
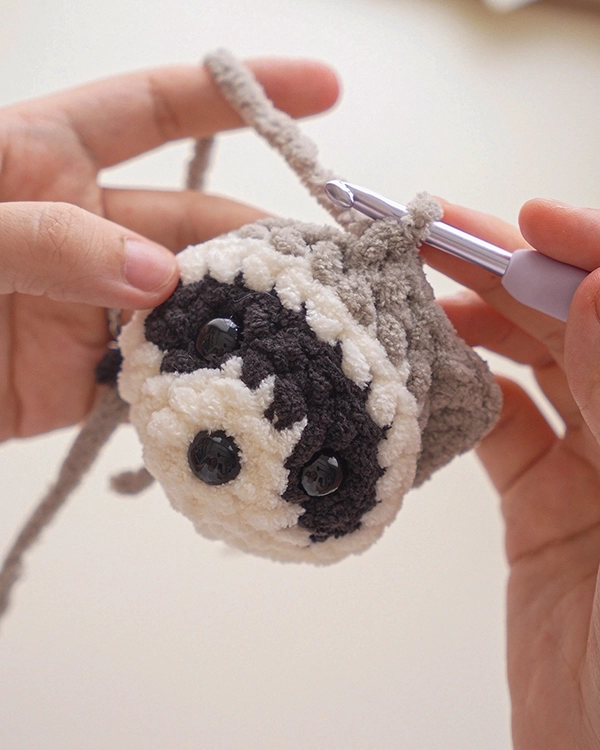
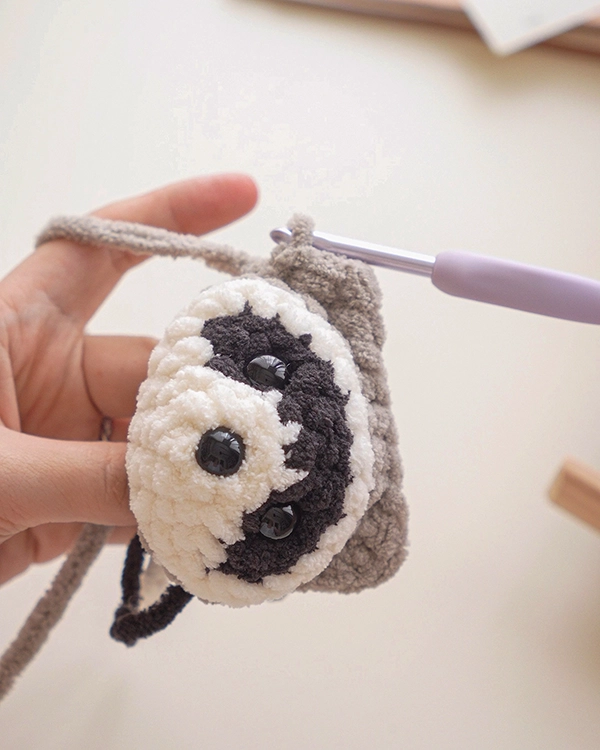
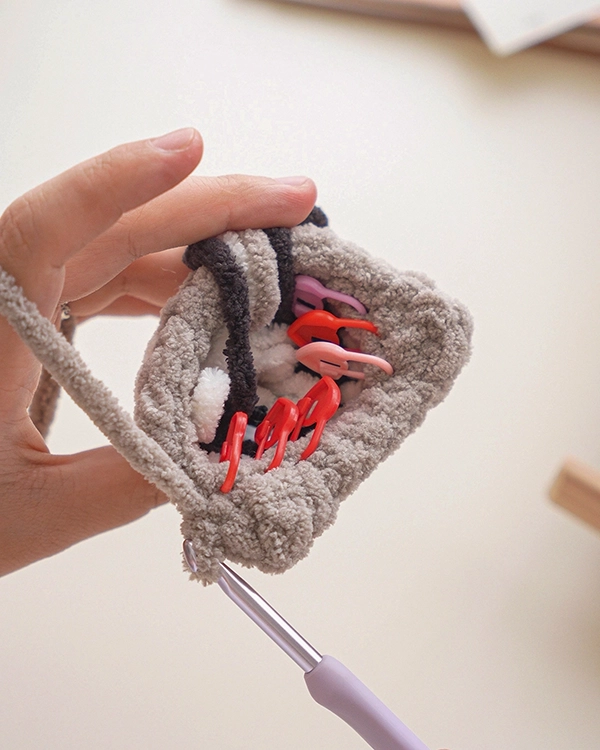
Rnd 7: 6 sc, skip the first ear, 3 sc into the marked back loops remaining of Rnd 5, 3 sc between the ears, skip the second ear, 3 sc into the marked back loops remaining of Rnd 5, 3 sc [18]
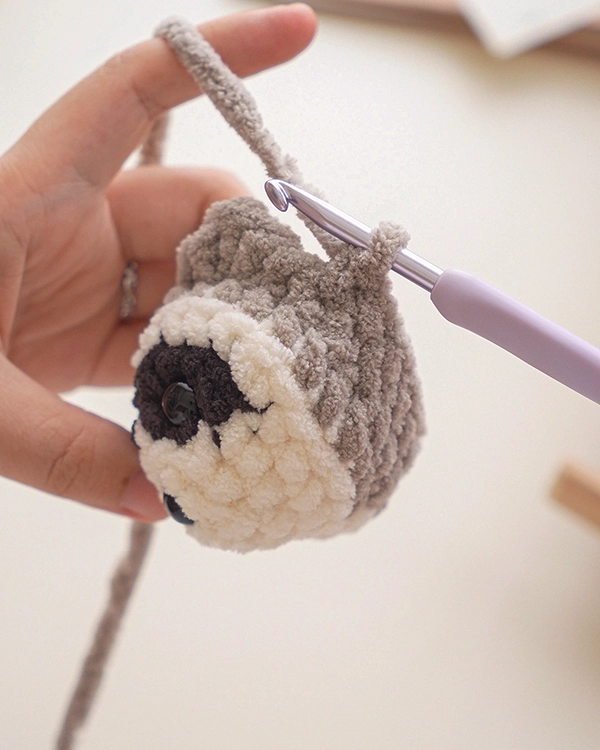
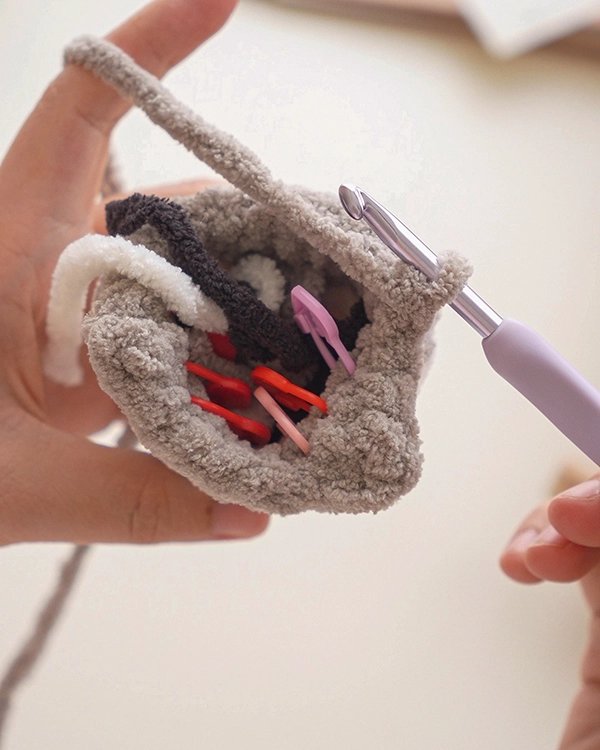
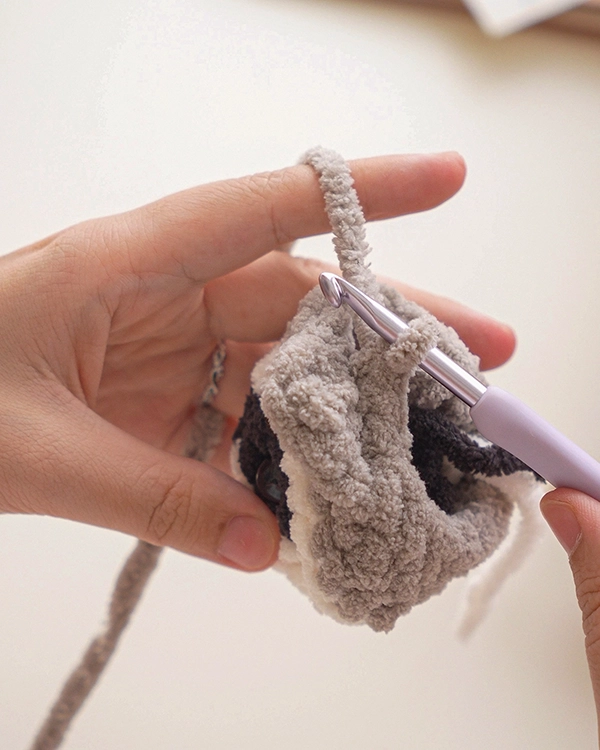
Rnd 8: 1 bobble-5-dc in black, 2 sc, 1 bobble-5-dc in black, 3 sc, (1 sc, 1 inc) * repeat 3 times, 5 sc [21]
Rnd 9 – Rnd 10: 21 sc [21] [2 Rounds]
Rnd 11: 1 bobble-5-dc in black, 3 sc, 1 bobble-5-dc in black, 6 sc, attach the tail by working 3 sc through both sides of the tail and the body, 7 sc [21]
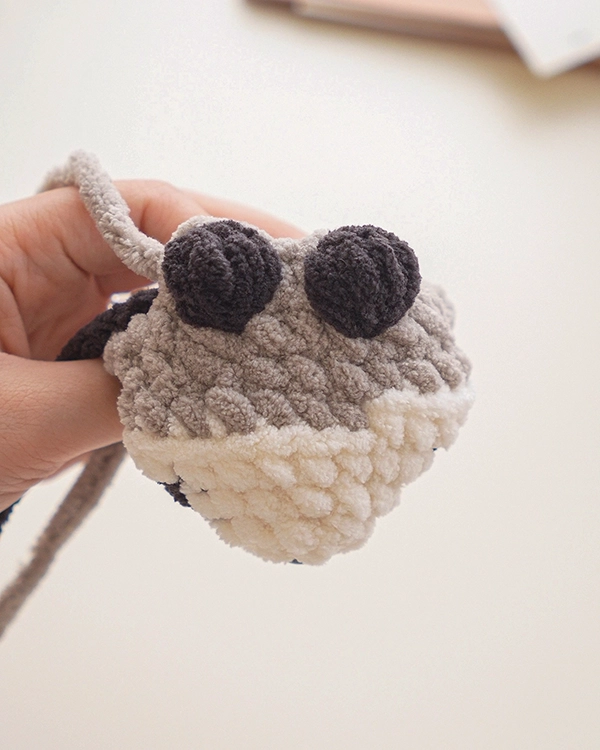
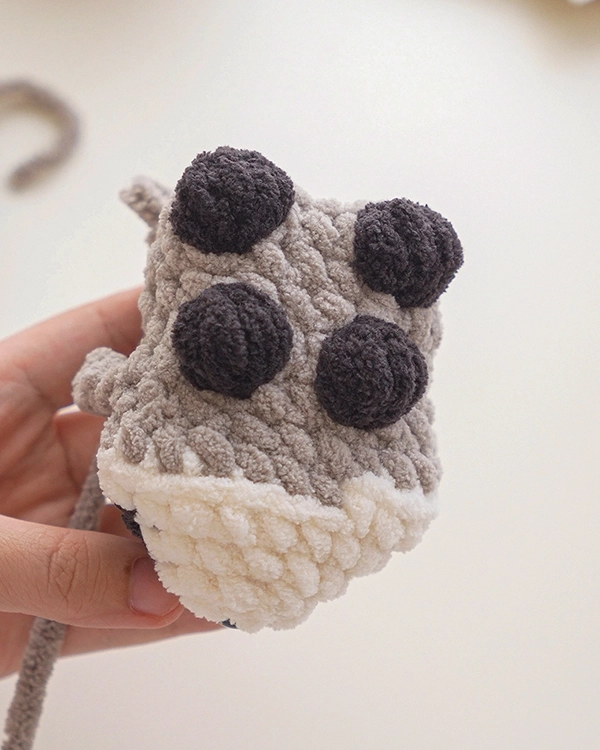
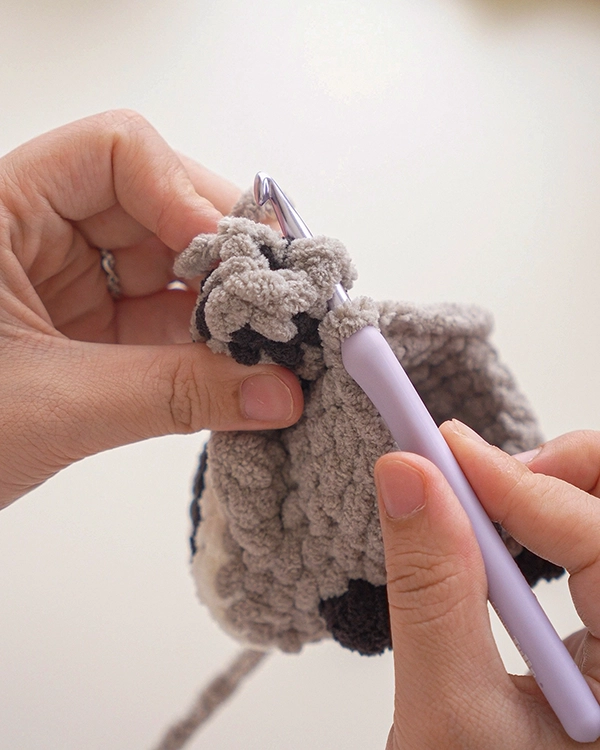
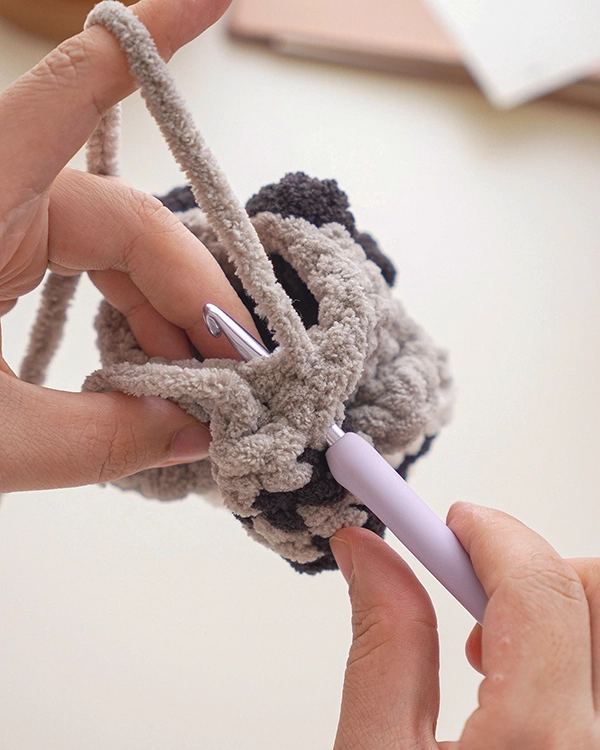
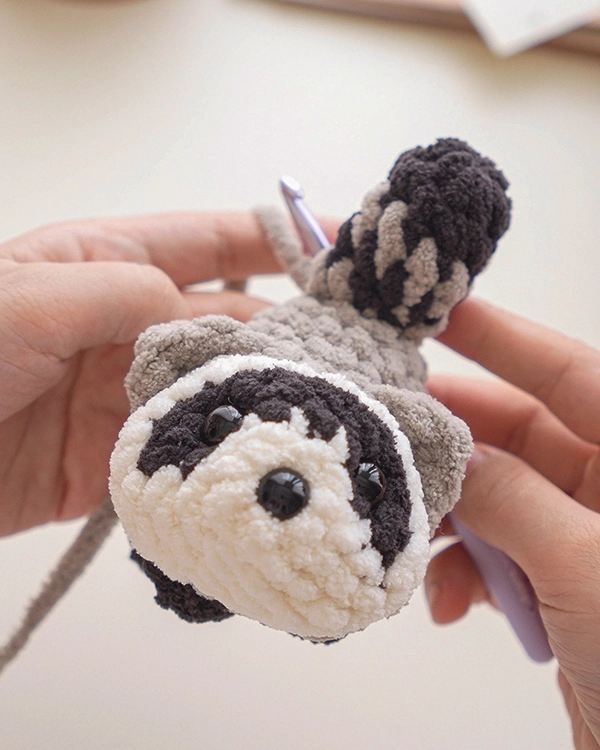
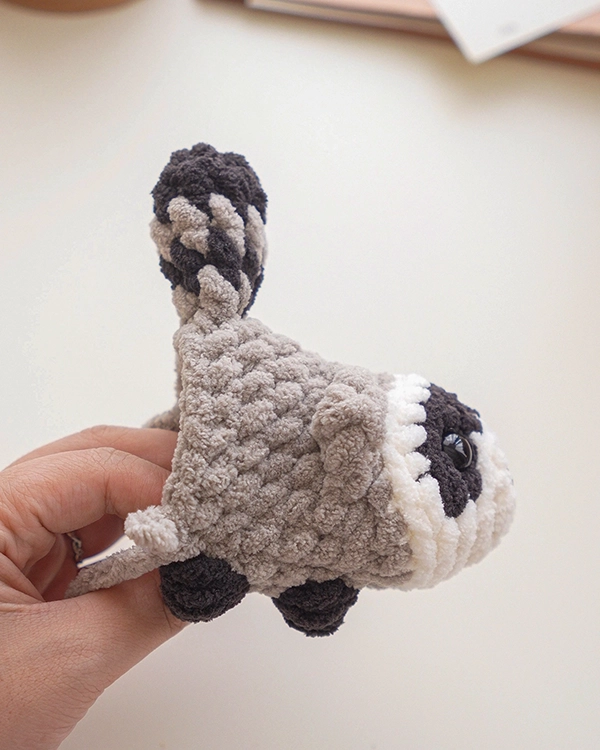
Rnd 12: (1 sc, 1 dec) * repeat 7 times [14]
Stuff the body.
Rnd 13: BLO 7 dec [7]
Slst in the next stitch and fasten off, leaving a long tail for sewing. Use a yarn needle, weave the yarn tail through the front loops of the last round and pull it tight to close the hole. Make a knot to make it more secure and weave the yarn tail inside the body.
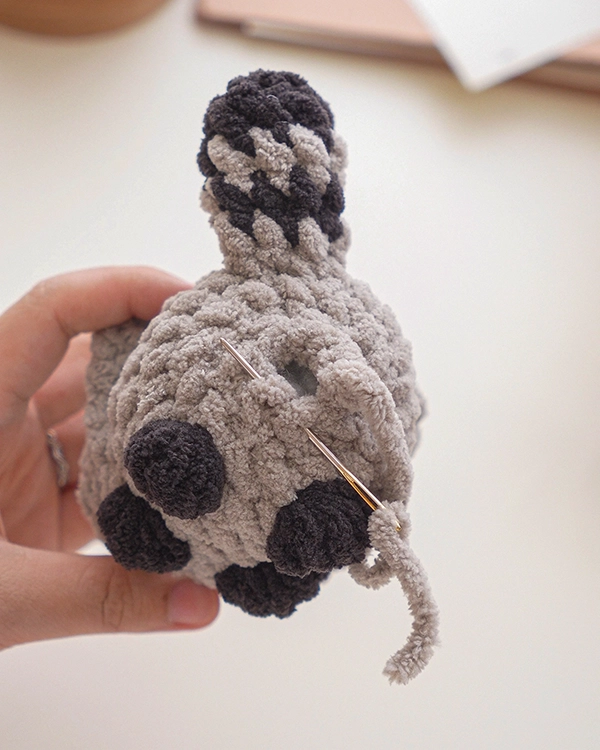
Adding details
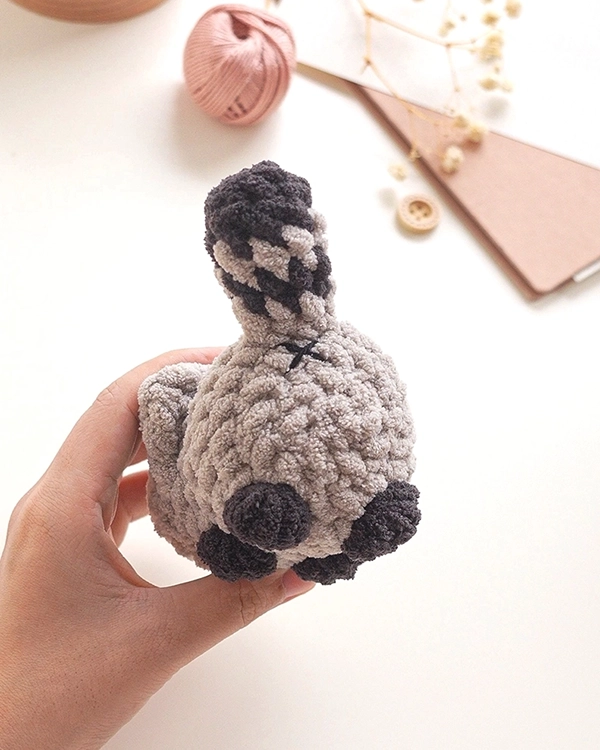
Embroider black yarn on each ear. Embroider the white detail on the lower part of each eye. Embroider the X-shaped button on Rnd 12 of the body, below the tail.
Potato Raccoon Mod
The step-by-step photos are the same as those in the Short Spine Raccoon pattern. Below is the written pattern for the Potato (Loafy) Raccoon. This version has a longer body, and the raccoon is made with #6 chenille yarn (Premier Parfait Chunky), which is thinner than the yarn used for the Short Spine Raccoon.
Tail
Work in spirals, begin with black yarn.
Rnd 1: 8 sc in the magic ring [8]
Rnd 2: 8 sc [8]
Change to gray.
Rnd 3: 8 sc [8]
Change to black.
Rnd 4: 8 sc [8]
Change to gray
Rnd 5: (2 sc, 1 dec) * repeat 2 times [6]
Fasten off, do not close. Do not stuff the tail.
Head and Body
Begin with white. Work in spiral rounds. Reference pictures in pages 8-10.
Rnd 1: 8 sc in the magic ring [8]
Rnd 2: [W 2 sc, 1 inc], [B work in BLO: 3 sc in the same stitch, 2 sc, 3 sc in the same stitch], [W work through both loops: 1 inc] [14]
Rnd 3: [W 3 sc, 1 inc], [B 3 sc in the same stitch, 6 sc, 3 sc in the same stitch ], [W 1 inc, 1 sc] [20]
From now on, crochet all stitches in white.
Rnd 4: 5 sc, BLO (1 inc, 10 sc, 1 inc), continue to work through both loops: 3 sc [22]
Change to gray.
Rnd 5: BLO 22 sc [22]
Place the safety eyes on both sides of the head, between Rnd 2 and Rnd 3, with ~3 sts in between. Place the nose (same size as the safety eyes) in the center of Rnd 1.
On Rnd 6, we will crochet the ears for the raccoon. The ears will be crocheted into the front loops only, so please place stitch markers on the back loops of Rnd 5, stitches 9-11 and 15-17, to make Rnd 7 easier to crochet (Stitch markers in Picture 10).
Rnd 6: 3 sc, 2 dec, 1 sc, work the first ear in FLO: slst in the next stitch, (1 hdc, 1 dc, 1 hdc) in the same next stitch, slst in the next stitch, continue to crochet through both loops: 3 sc , work the second ear in FLO: slst in the next stitch, (1 hdc, 1 dc, 1 hdc) in the same next stitch, slst in the next stitch , continue to crochet through both loops: 1 sc, 2 dec [18]
Rnd 7: 6 sc, skip the first ear, 3 sc into the marked back loops remaining of Rnd 5, 3 sc between the ears, skip the second ear, 3 sc into the marked back loops remaining of Rnd 5, 3 sc [18]
Rnd 8: 1 bobble-5-dc in black, 2 sc, 1 bobble-5-dc in black, 3 sc, (1 sc, 1 inc) * repeat 3 times, 5 sc [21]
Rnd 9 – Rnd 12: 21 sc [21] [4 Rounds]
Rnd 13: 1 bobble-5-dc in black, 3 sc, 1 bobble-5-dc in black, 7 sc, attach the tail by working 3 sc through both sides of the tail and the body, 6 sc [21]
Rnd 14: (1 sc, 1 dec) * repeat 7 times [14]
Stuff the body.
Rnd 15: BLO 7 dec [7]
Slst in the next stitch and fasten off, leaving a long tail for sewing. Use a yarn needle, weave the yarn tail through the front loops of the last round and pull it tight to close the hole. Make a knot to make it more secure and weave the yarn tail inside the body.
Adding details
Embroider black yarn on each ear. Embroider the white detail on the lower part of each eye. Embroider the X-shaped button on Rnd 14 of the body, below the tail.
Finishing Up
Once your raccoon is done, let it play with the trash can! These little guys are made for a quick, satisfying crochet session. If you’re doing a craft fair, honestly? Make a whole basket of them! I think they will sell like crazy!
I’d love to see your finished raccoons! Tag me @greenfrog.crochet on Instagram or use #greenfrogcrochet so I can share your work.
Thank you for crocheting with me today! If you love cute crochet patterns like this one, make sure to join my newsletter for crochet tips, and new pattern updates delivered straight to your inbox. I can’t wait to crochet with you again!
You can find more crochet patterns in our Etsy and Website shops.
For more inspiration and behind-the-scenes contents, join me over on Facebook or Instagram!
Happy Crocheting!
This post may contain affiliate links. View our disclosure policy here.
Copyright © 2026 Green Frog Crochet. All rights reserved. Please do not redistribute or sell this pattern as your own. You are welcome to sell finished items made from this pattern.